
With the OneClick interface, you can easily and accurately modify your team's schedules in a timely manner.
Introduction
Efficiently managing shift times for your team members is crucial for accurate scheduling and ensuring smooth operations. With OneClick, you have access to a user-friendly interface that simplifies the process of editing shift times. In this article, we will guide you through the steps of editing shift times in OneClick, empowering you to make timely and precise adjustments to your team's schedules.
Accessing Shift Time Editing
To edit a team member's shift time using OneClick, follow these steps:
- Opening Employee Preview:
- Right-click on the team member's shift that you want to edit or hold down the left mouse button to access the options menu.
- Select "Open Employee Preview" to view the details of the selected shift.
Editing Shift Times
Once you are in the Employee Preview interface, follow these steps to edit the shift times:
-
Accessing Edit Mode:
- Within the Employee Preview, locate the "Edit" button associated with the team member's shift.
- Clicking on this button will enable you to make modifications to the shift.
-
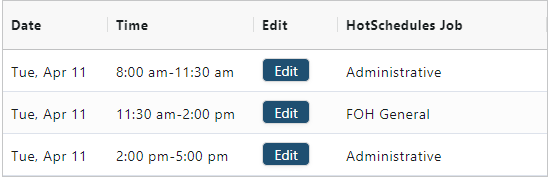
Modifying Shift Times:
- Adjust the start and end times of the shift to reflect the desired changes in the team member's schedule.
- This ensures that the updated shift accurately represents the revised timing for the team member.
-
Saving Changes:
- After modifying the shift times, click on the "Save Changes" button to apply the updates.
- The system will process the changes, typically taking less than a minute to update any associated breaks or other relevant symbols.
Observing Shift Time Editing in Action
To see the process of editing shift times in OneClick and experience the efficiency and ease-of-use of the interface, watch the provided demonstration video. This video showcases the steps involved in editing a team member's shift times, providing a visual demonstration of the process.
The following is a transcript of the video generated by a computer. The wording may be different.
[00:01] Hi, everyone from OneClick. So, this is part two in the custom shift part. In the last video, we created a new shift for Addison here. You can see that by the OCA general, and the little tildes there. This video is going to go over how to edit the times for that shift, so for example, I need Addison to stay later, or if I need, in this case, because I made that, or I need Hannah to come in instead of at 12, I need her to come in at 11, that kind of thing. So, let's go over that now.
[00:32] So, the way we do that is we right-click and get to the preview, or you can hold down left-click if you're on like an iPad or on your computer, you can get to this preview. I can then click on the edit button, and I can click on whatever time I need to, or I can click on the little clock here, and say, “Hey, maybe I need you to actually come in at 10 A.M. instead of 3”. So, then you can say that they're still in front of house, save. So, from here, you can see that Addison there, it changed rather quickly. So, it has that circle— That circle is gone, and then added a teacup showing that they get a break, and we can put them in and do kind of whatever we need to, and maybe we need them to stay later, until let's say 7. So, I can do that same thing, push save, you can see it now turns kind of a white, and then instantly goes back showing that they get that break.
[01:26] Now let's say for example, I need her to stay way later, and she just came in, but I also need, let's say, Haley to come in a little earlier as well, or let's say Hannah. So, we can see here that Hannah works from 9 to 5:30, and so if I try to edit, let's say this shift, that she works 12 to 4, and I need her to come in at 11 up front, when I try and change this to 11 A.M., it's going to yell at me that she already works at a different time from 10 to 12. And so, it kind of has that, “hey, you can't overlap anything that way”. So, if I needed her to come in up front, I would need to edit this marketing shift down to 11 A.M., and then I could save that, and then it can go back to Hannah. You can see here that I could restore it back, and we'll go over that in a couple videos. But you can see here that it's been changed. I can also change this one back to 11 A.M., and then you can hit save, and so you can see there it updated, but you can come back in and restore it back to its original shift, or you can just leave it the way that it is and kind of go from there.
[02:41] So, that's how you edit times, and you can do that on any shift that you have here. You can also go into each individual staff member. So, for example, let's say Christian, I can do, in this case, I'm looking at Tuesdays, but I could also change his Wednesday, and I've already talked to him and say, “hey, you're going to come in instead of about 5 P.M., you'll come in at 6”, and that'll change. And then I could also always restore it back to the way that it was before, as if nothing had changed. I can't change anything else, and if I need to, I would go into HotSchedules to change those. We don't talk back to HotSchedules, so if whatever changes you make here is only on OneClick's end, but if you went into OneClick and changed anything there, it would update on this end as well. So, you can kind of go from there. So, if you do have any more questions, don't hesitate to email us, or you can use the ‘Reply with Video’ button down below. In the next video, we're going to talk about switching from the back of house, or the front of house, in this case, to the back of house. So, let's say Addison needs to work in the back, or vice versa, and we'll kind of go from there.