Table of Contents
Product Tab
Overview
The Waste Module helps teams quickly and accurately log product waste during busy shifts. With a streamlined, touch-friendly workflow and a modernized interface, users can record waste in seconds without interrupting operations. The module is designed to reduce friction, improve accuracy, and ensure waste data is consistently captured for reporting and analysis.
Key Capabilities
• Fast, tap-based waste logging
• Clean, modern interface optimized for busy shifts
• Session-based tracking for immediate visibility
• Familiar interactions (favorites, highlighting)
• Reduced errors through simplified inputs
Creating
To start configuring your waste products and prices, go to the Main Menu – Settings – Waste. Here you can see a list of default products.
Adding New
Press the "+" button on the top right to add a new product. Determine the Name, description, and other details.
Want a list of over 100 pre-configured CFA products from our team? Contact us!
Accessing
There are two ways to access the waste module.
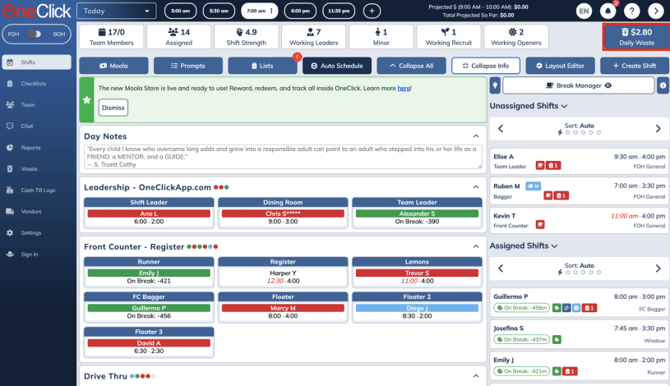
1. On Shifts Screen – ensure the  is selected, then press Waste on the top right of the screen. Your waste module will pop up.
2. Main Menu – click the “Waste” option, then press "+" button to open the waste module.
Waste Tabs
There are two tabs inside the waste module. Product and Quantity.
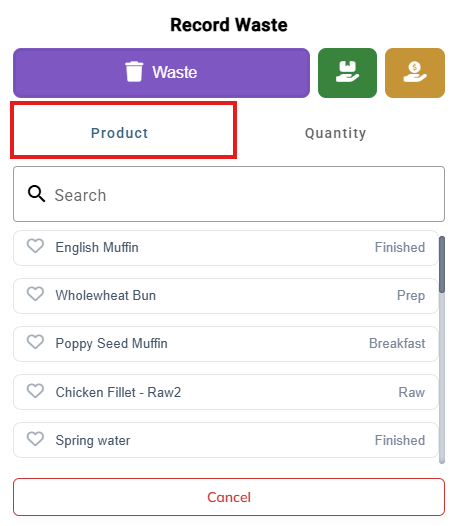
Product Tab
• Displays the full list of available products
• Ability to search among products.
• Users tap a product to add it to the current waste session or press the heart button to save as a favorite (will show on quantity page tab).
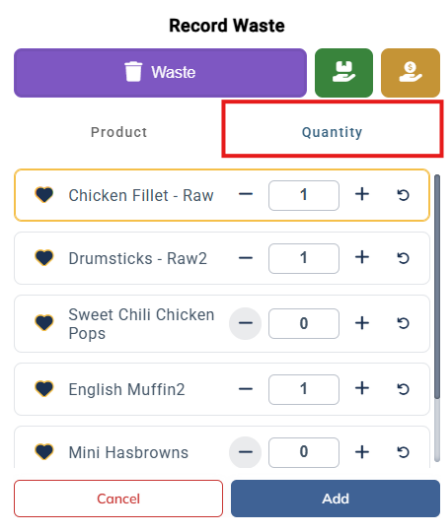
Quantity Tab
• Displays all your favorited or hearted items.
• A short history is displayed at the bottom to ensure there are no duplicate entries.
• Items automatically move to the top of the list when updated, so the most recent entries are always visible.
View/Filter
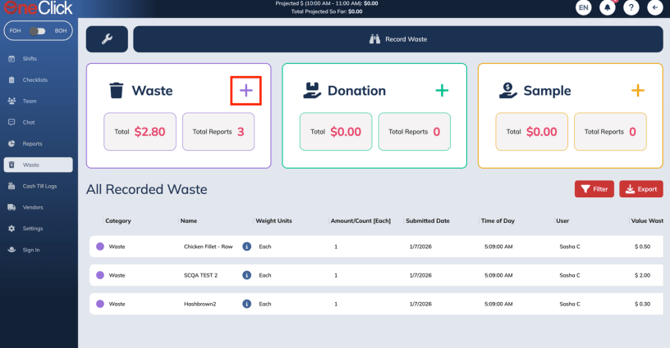
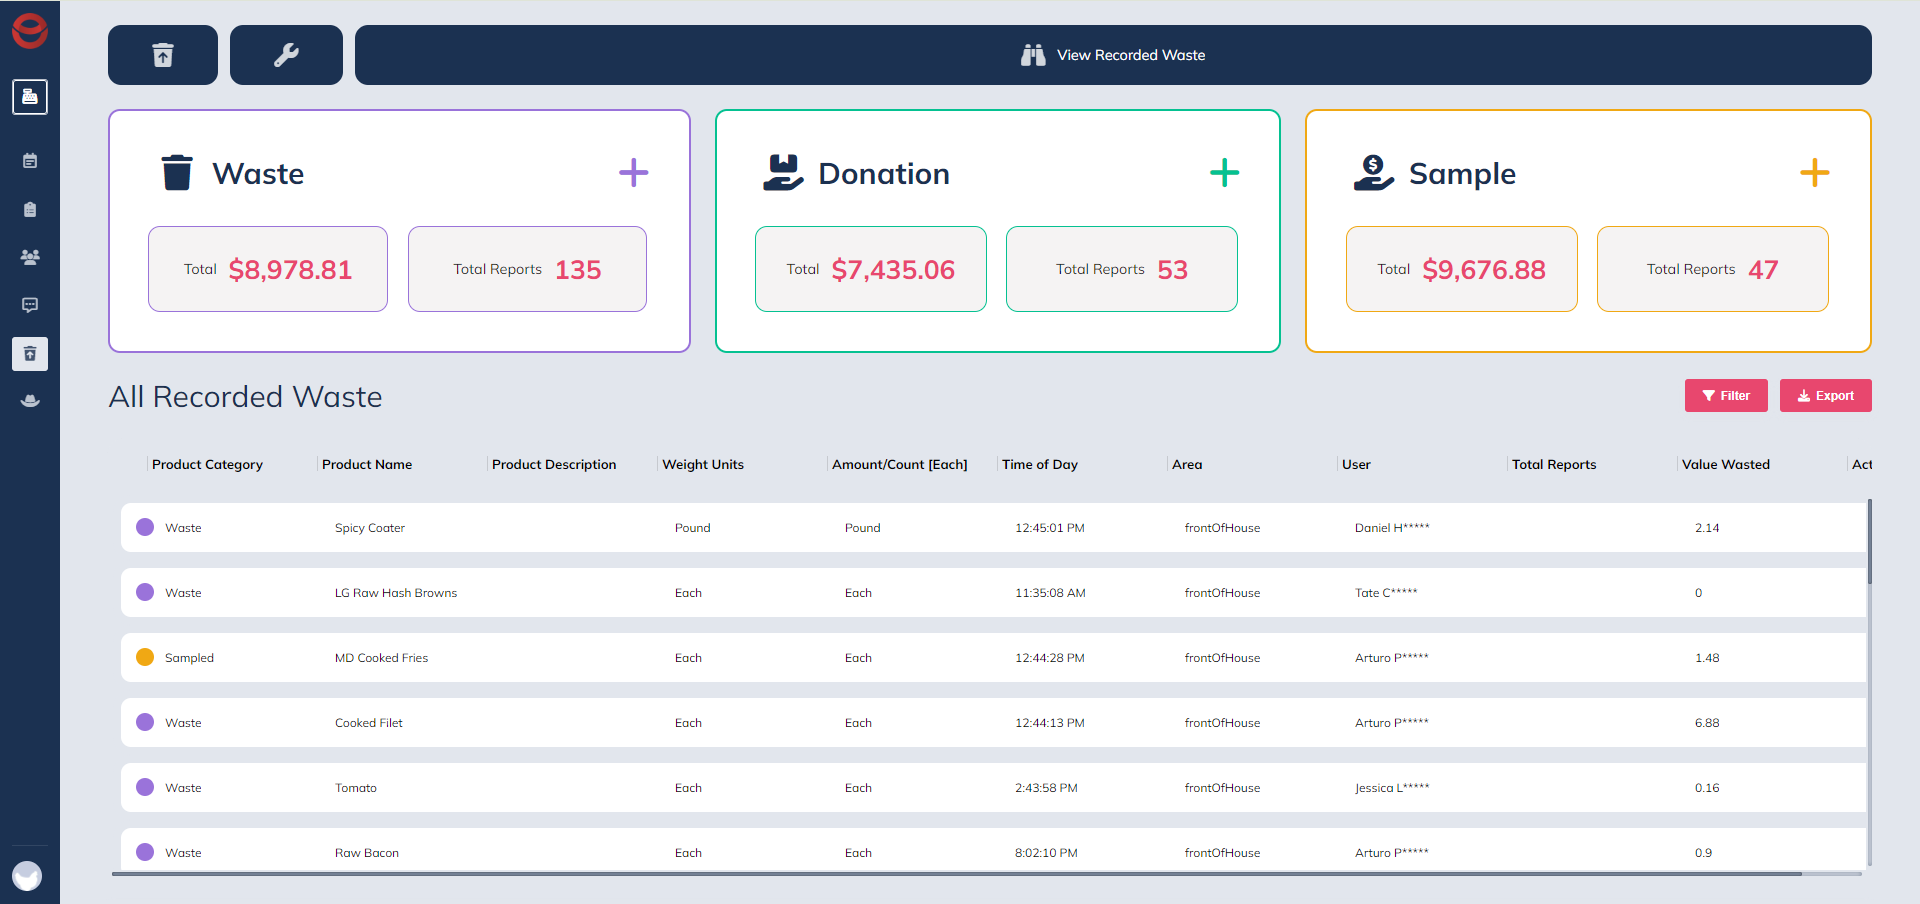
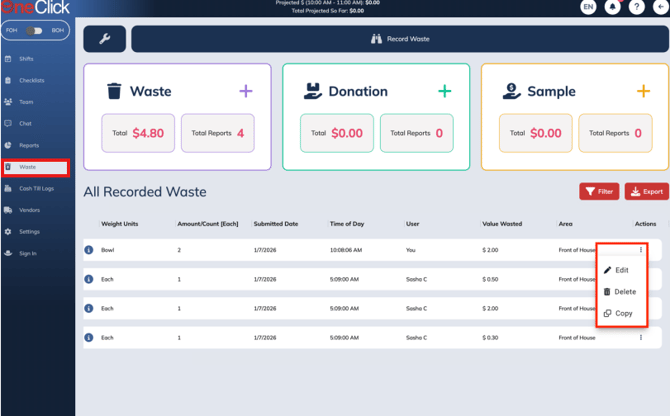
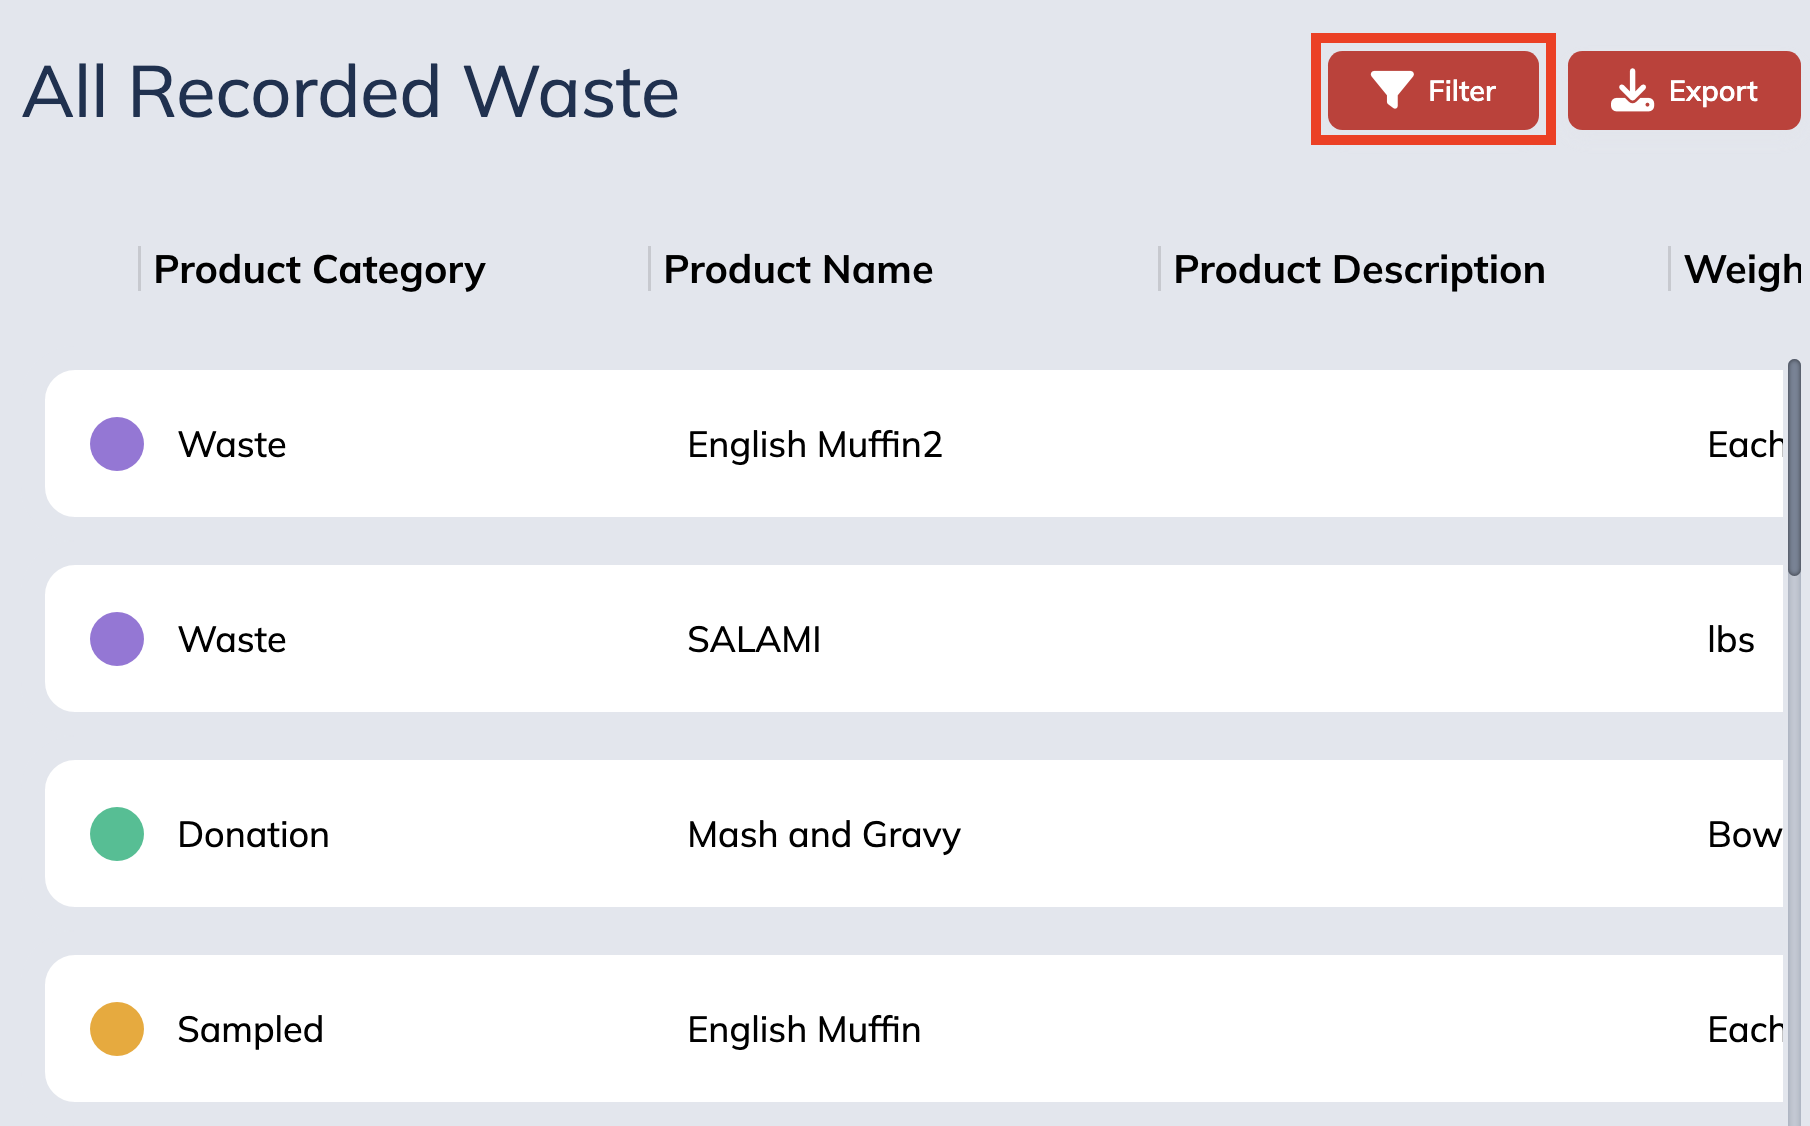
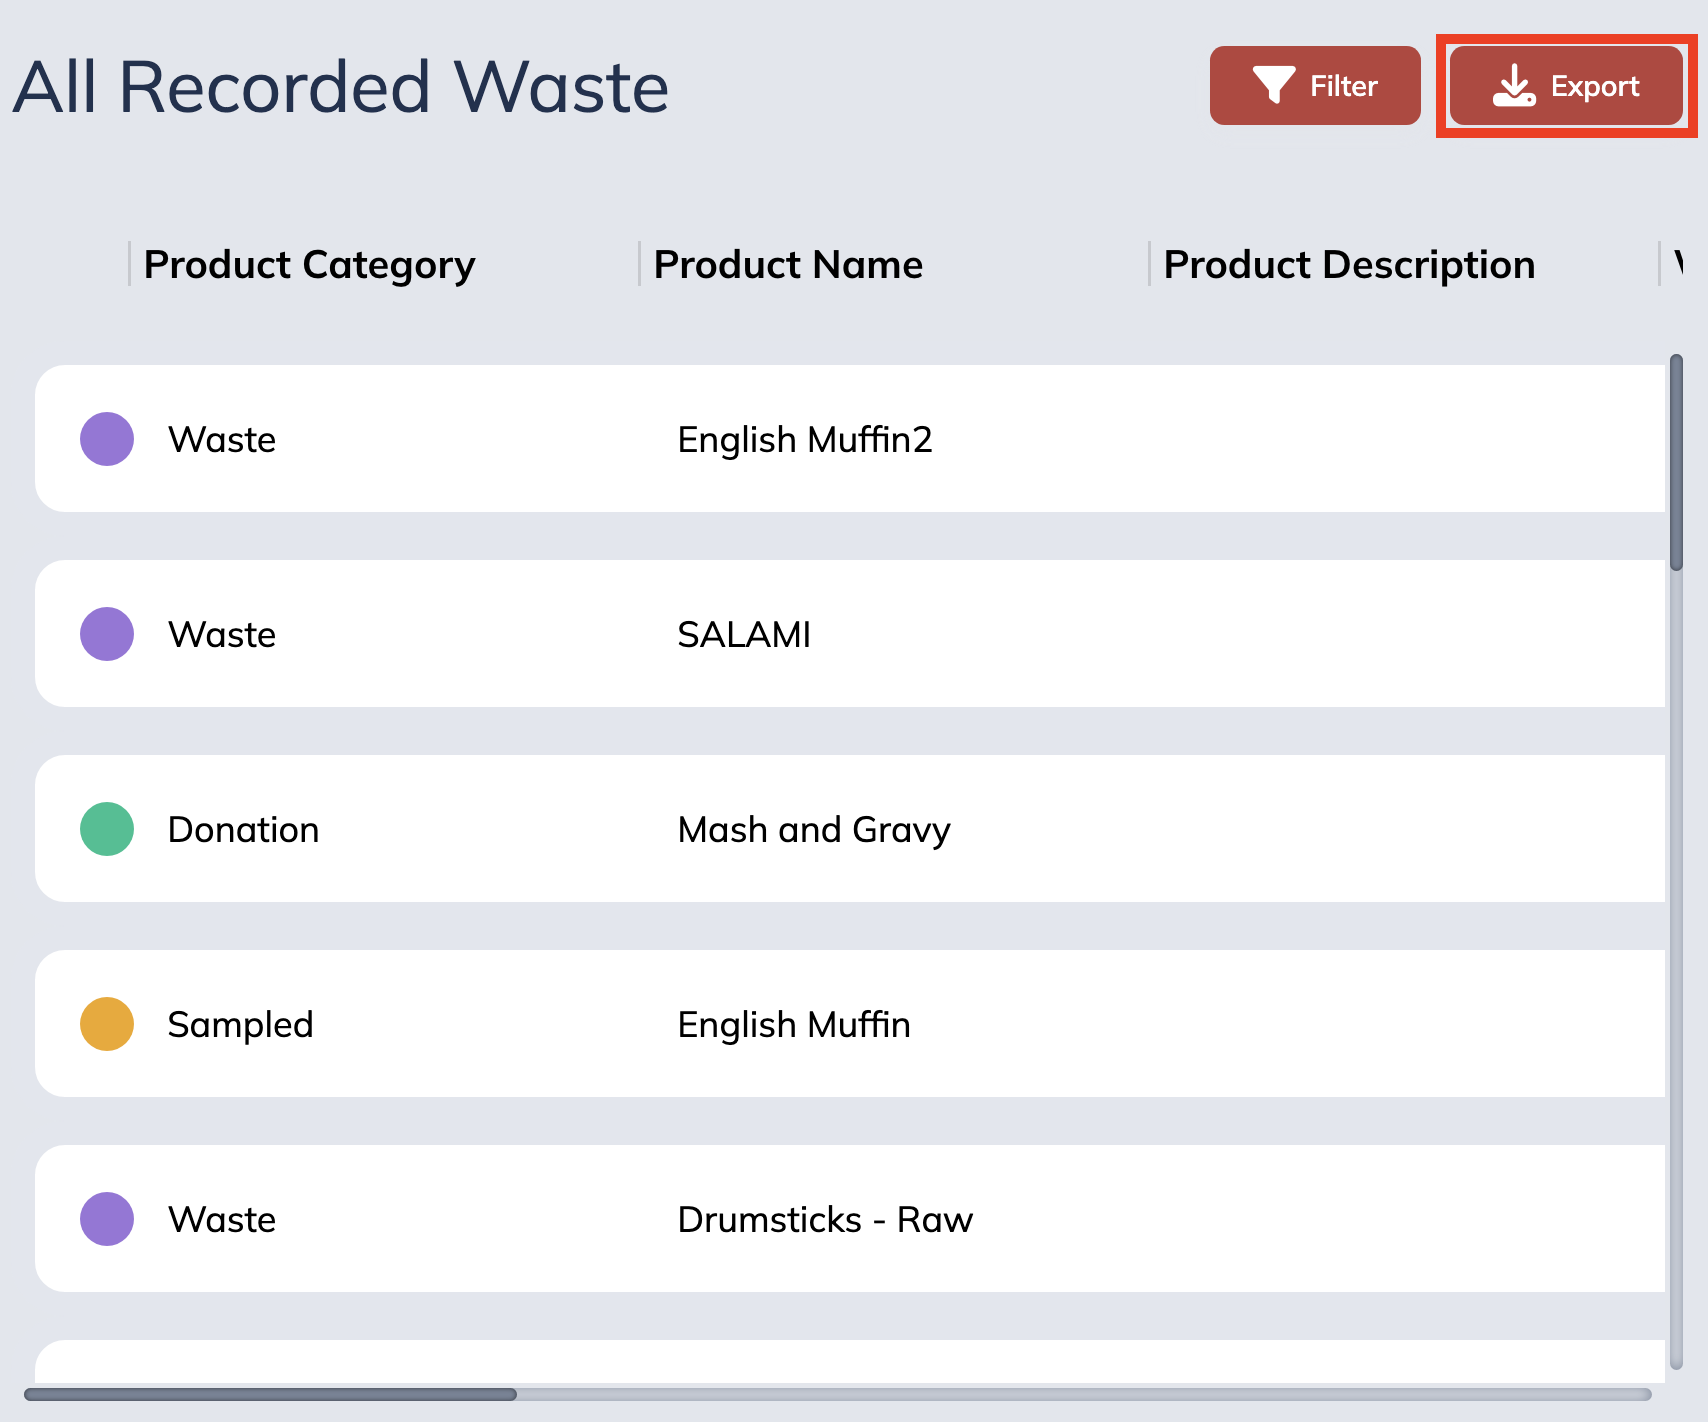
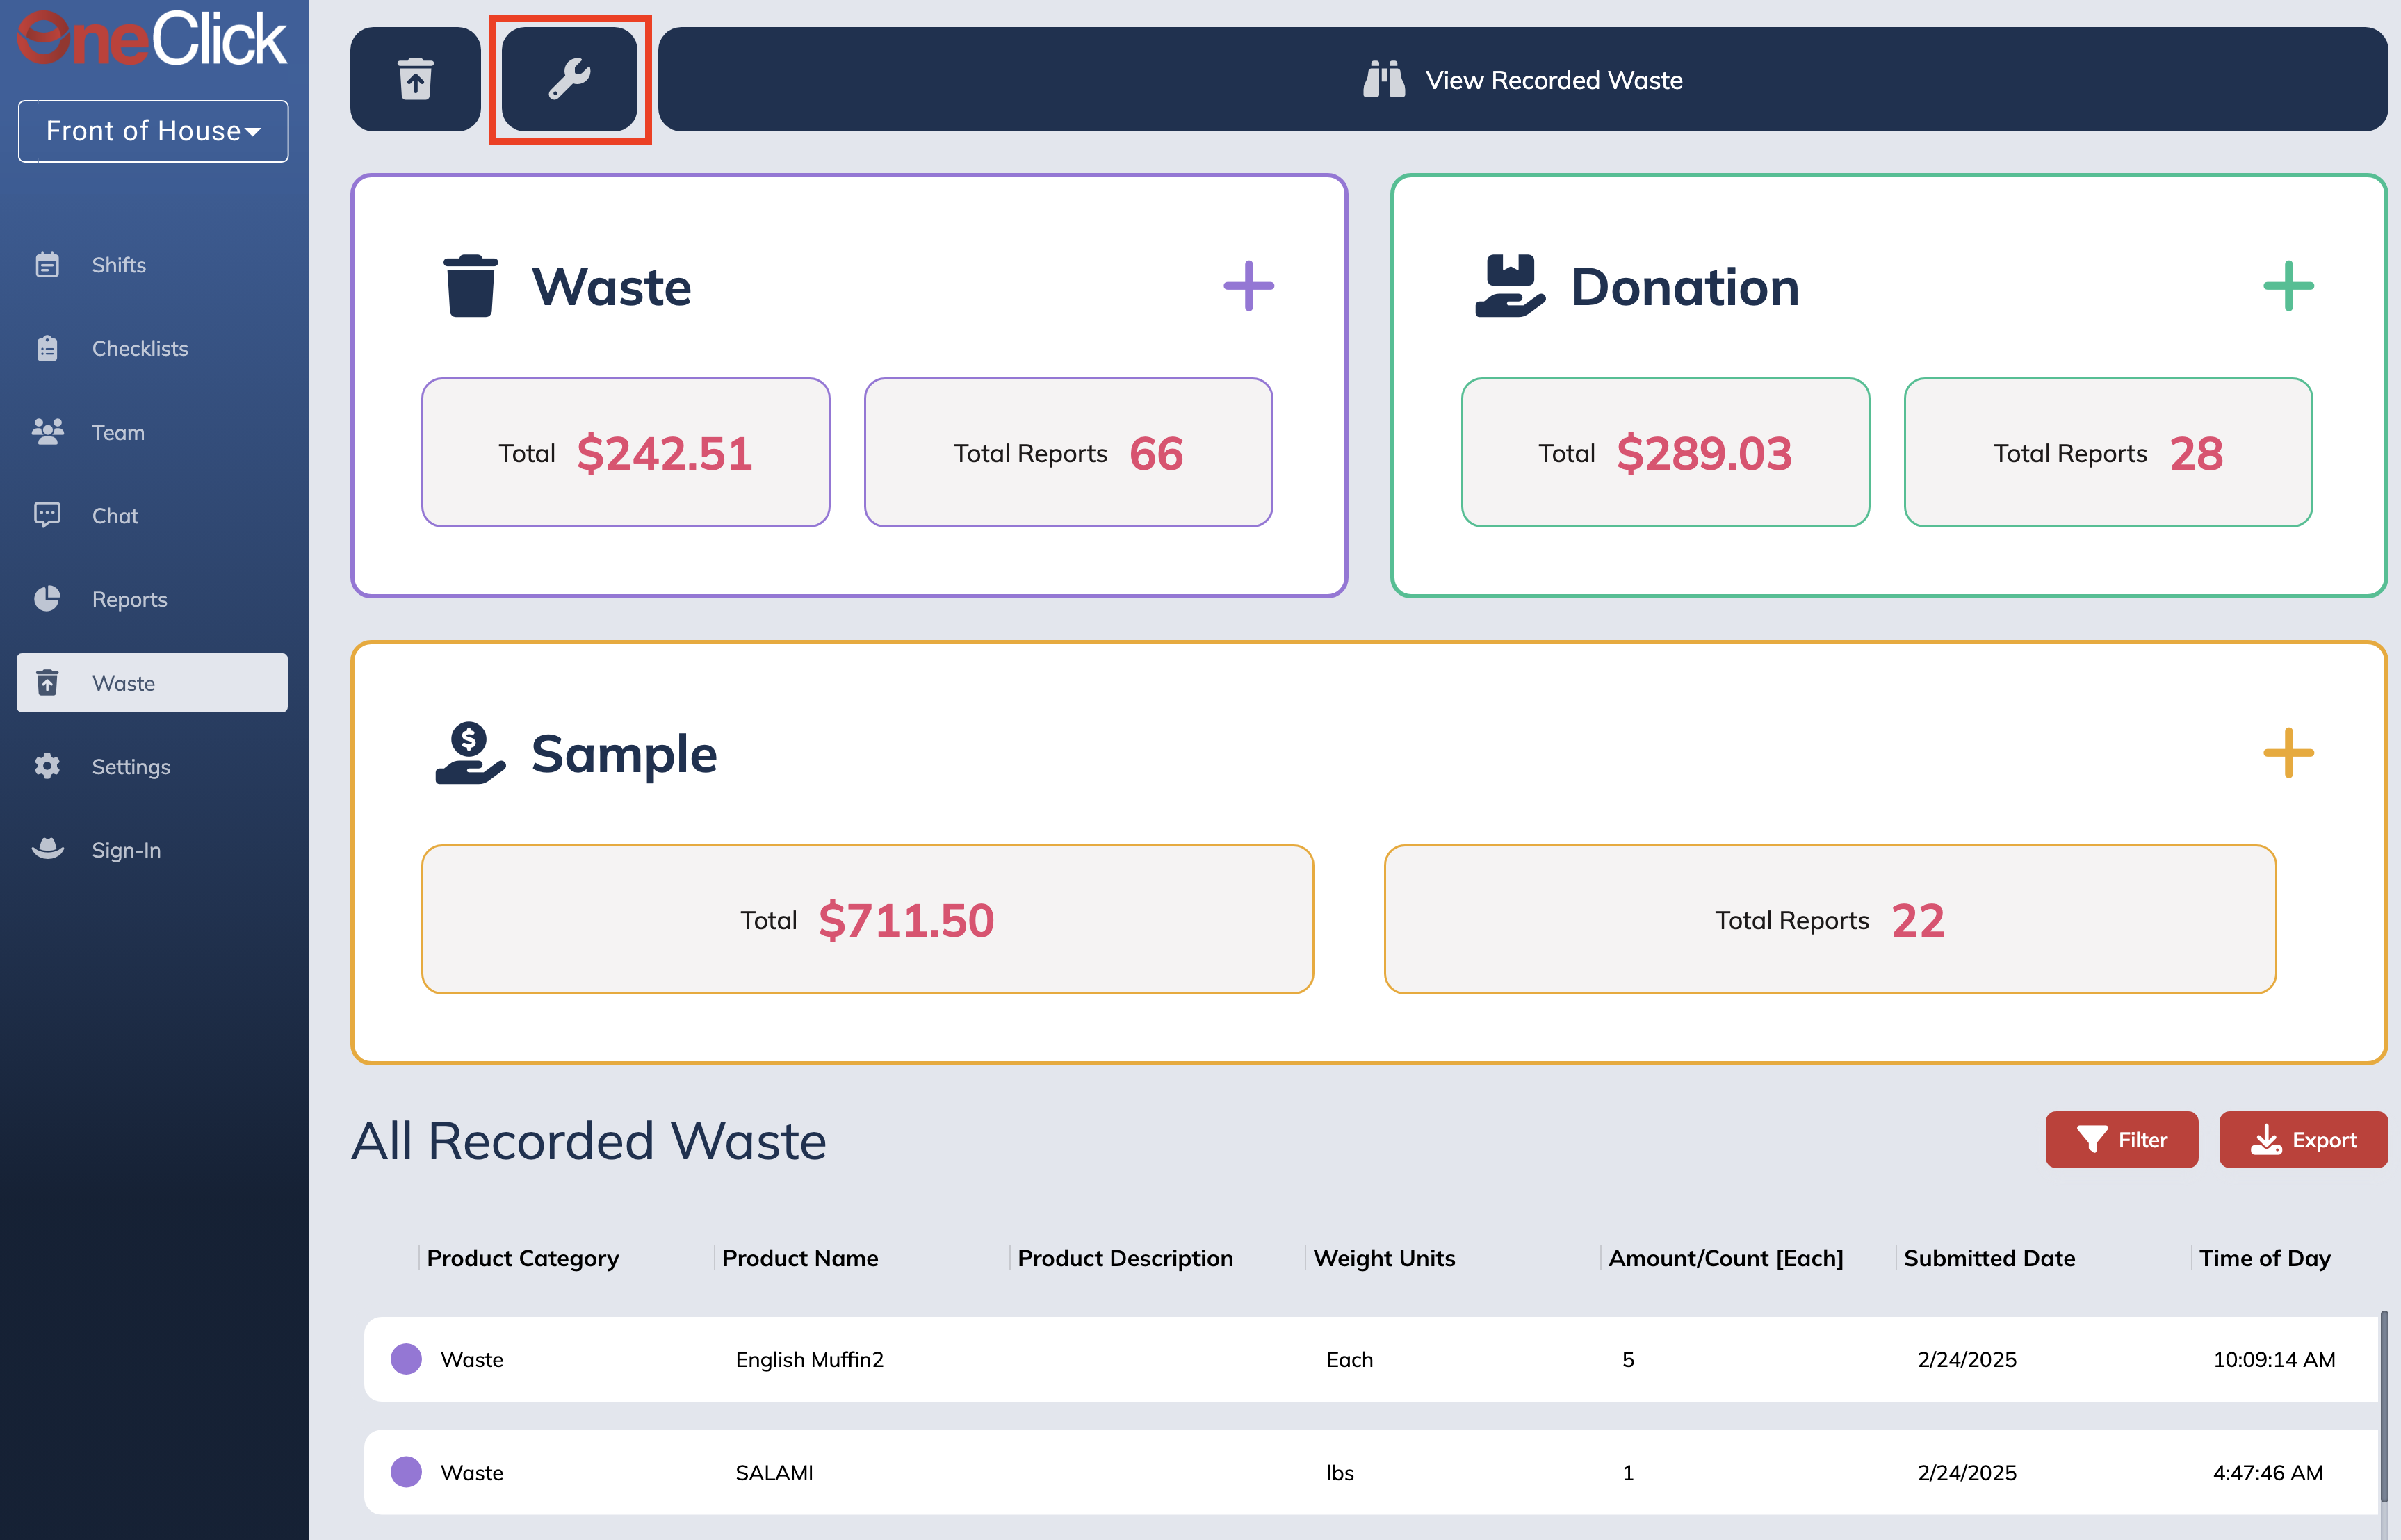
To see the waste that has been recorded by your store, click on the Waste button on the left menu, then scroll down to see the waste list. Here you can view:
- Record wasted, donated or sampled food
- View and filter waste that has already been recorded
- Export and Download waste reports as a CSV or PDF file
Logging Waste: Step-by-Step
| .1. Navigate to the Waste Module via the main menu or the shifts page. | 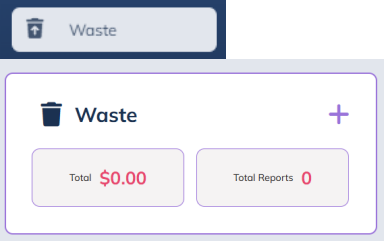 |
| 2. Select a product from the Product Tab. | 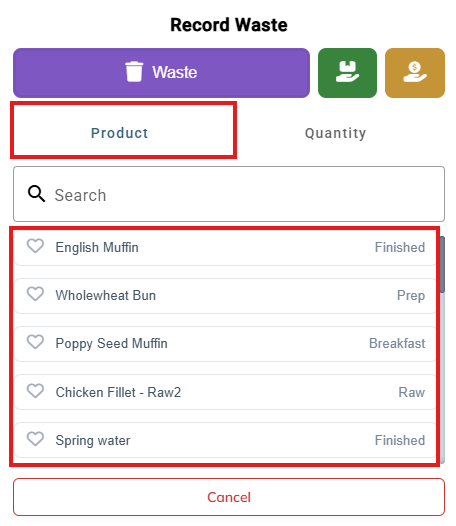 |
| 3. The item appears in the Quantity Tab with a quantity of 0. | 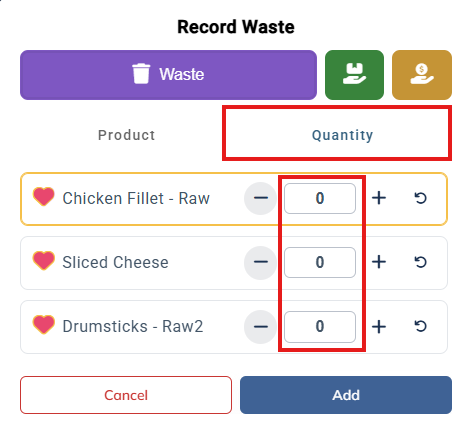 |
| 4. Adjust the quantity as needed using inline controls. Alternatively, you can free-type the amount into the text field. |  |
| 5. Log other waste entries at the same time, if necessary. | 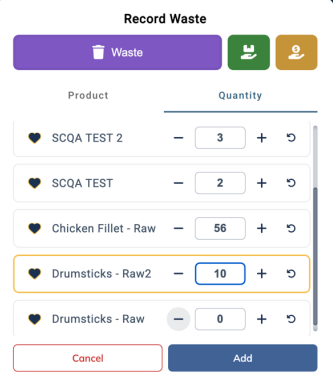 |
| 6. Press Add. |
Configuring Items
To edit your waste items, go to the main menu, then press Settings – Waste. Here you can edit your list of products.
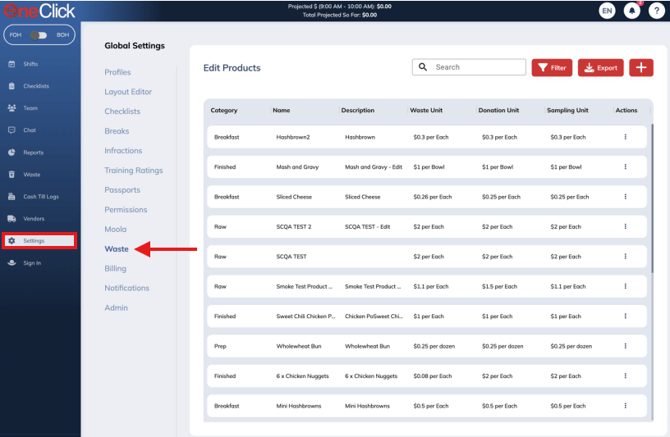
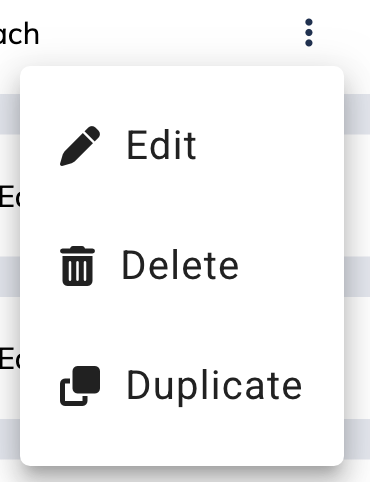
Tapping the three dots on the right of a product allows you to edit, delete, or copy.
![]()

Editing Entry
If an entry was added by error, you can edit it by navigating to Waste through the Main menu, then pressing the three dots on the right of the record.
Filter Waste Entries
By default, the total money lost in your store for Waste is a lifetime total.
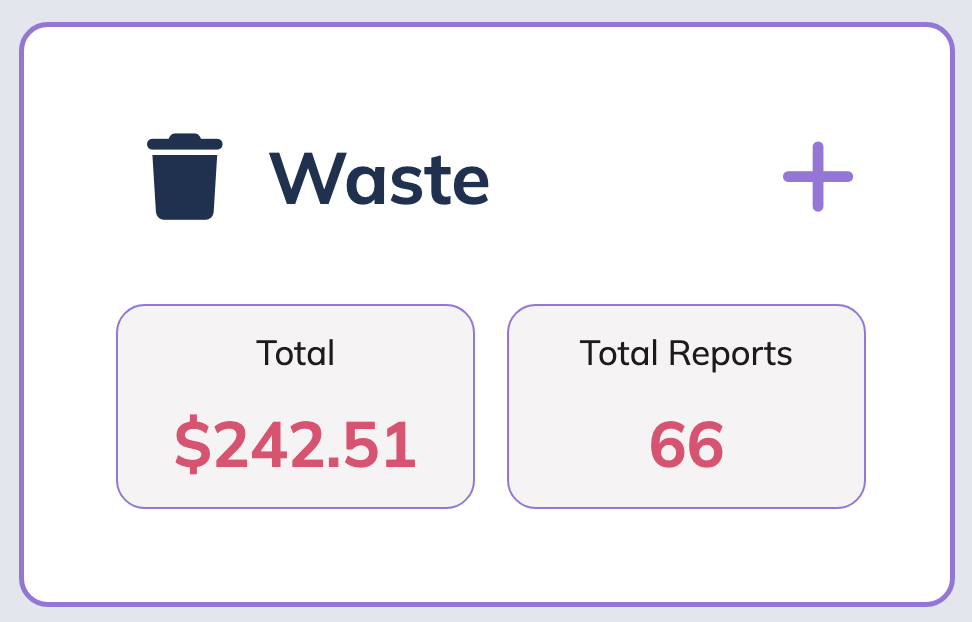
You can easily filter your Waste history to see specific losses for that timeframe. These filters can be accessed by clicking the "Filter" button.
Once you select the filter button, a window will appear with the following filter options
- Waste Mode - Select a waste mode (Waste, Donation, or Sample) to filter entries by.
- Product Category - Filter displayed products by category (i.e. BOH - Raw vs. FOH - Finished).
- Product - Select an individual waste product to display
- Reason - Select a waste reason (i.e Expired or Damaged Stock) to filter displayed products by
- Destination - Filter by FOH, BOH, or any other areas you have configured for your store
- Time Period - Filter displayed entries by a variety of preset time periods.
- Date range - Filter displayed entries by a specific range of dates
- Start/End time
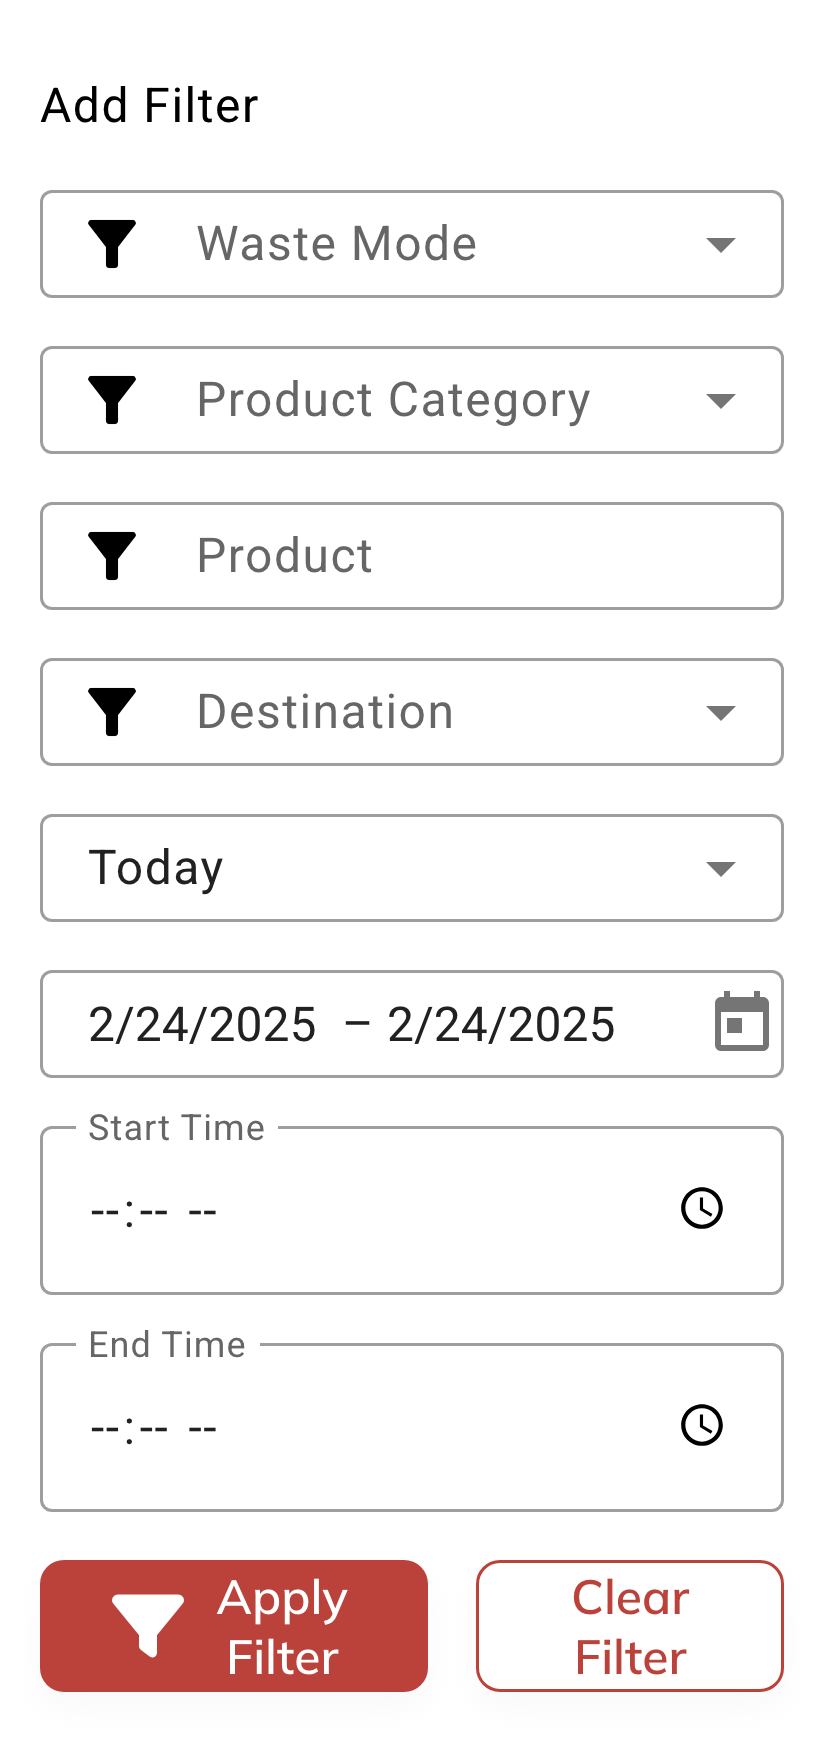
Use the "Apply Filter" button (see above) to apply the current filters to the displayed waste entries. To reset to the original view, use the "Clear Filter" button.
Reports
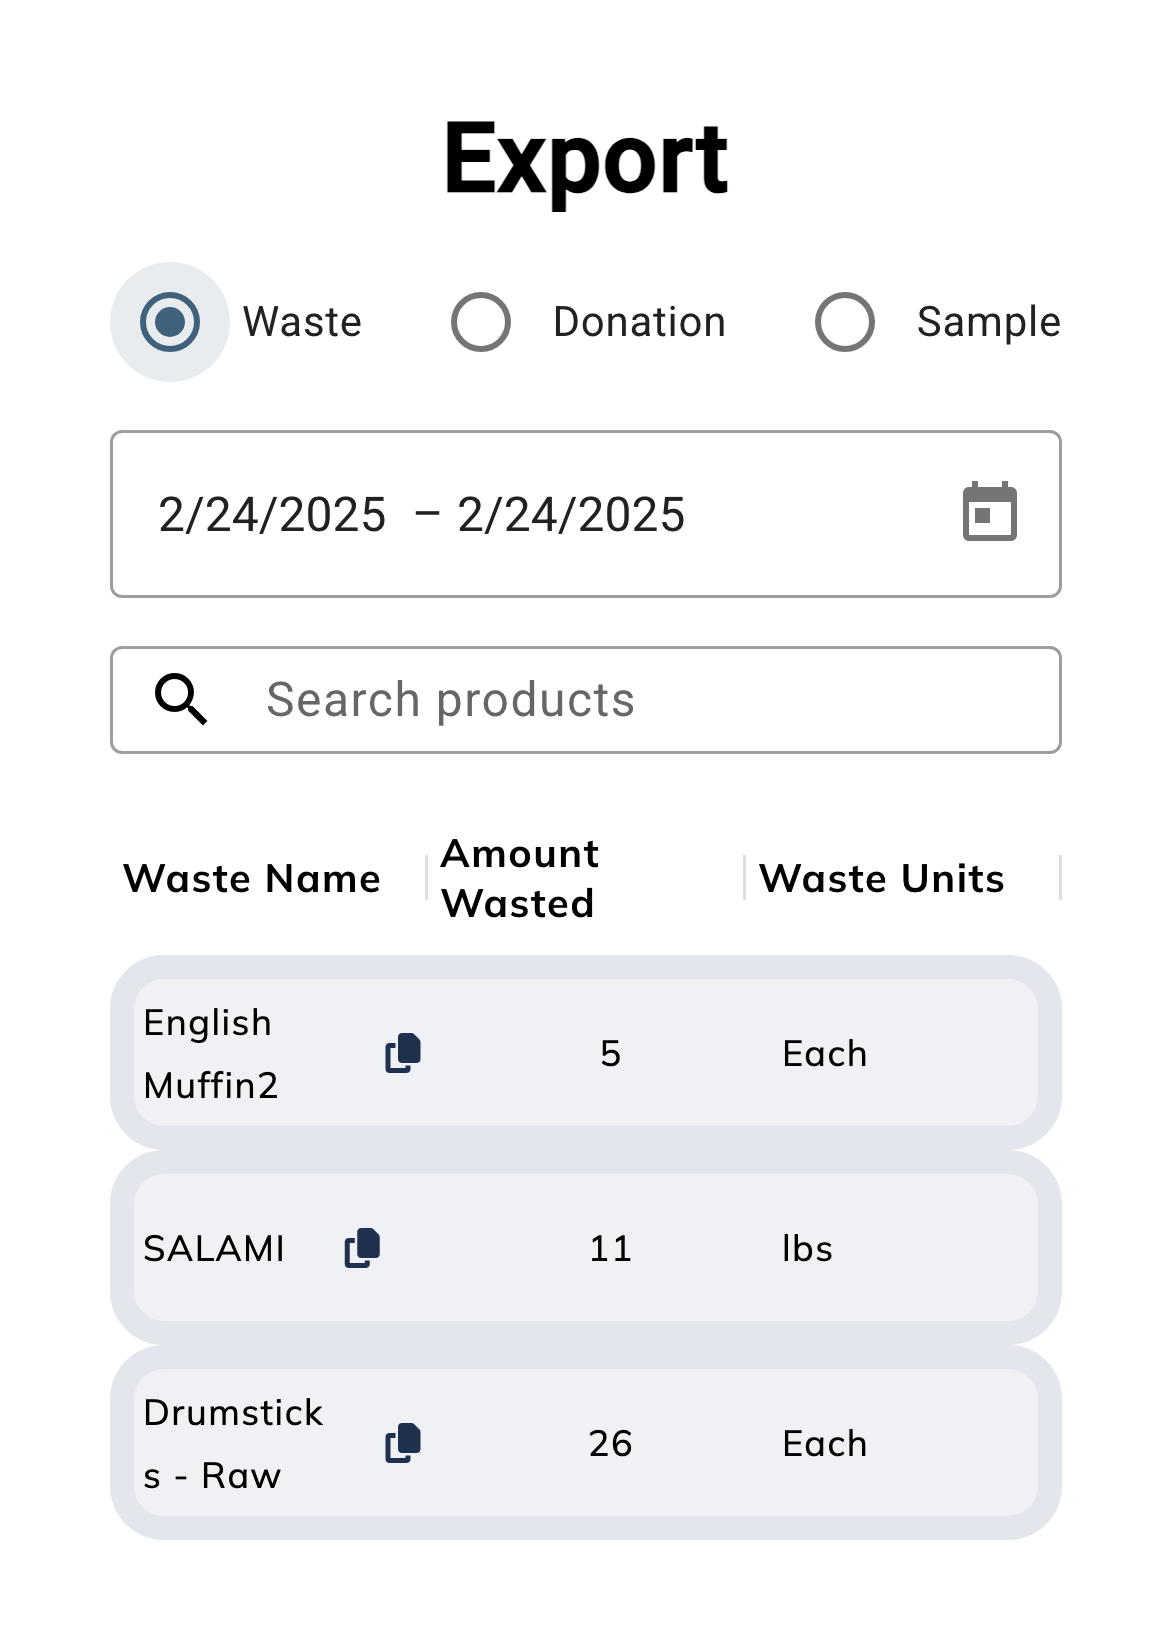
To export your OneClick Waste history, simply locate and select the “Export” button on the Waste screen.
This button will launch the following dialog window, where you can select which products to include in your export. Select either Waste, Donation or Sample, select a date range, and use the “Search Products” bar to search for specific products. Leave the search bar blank if you want to include all products in a specific category and date range.
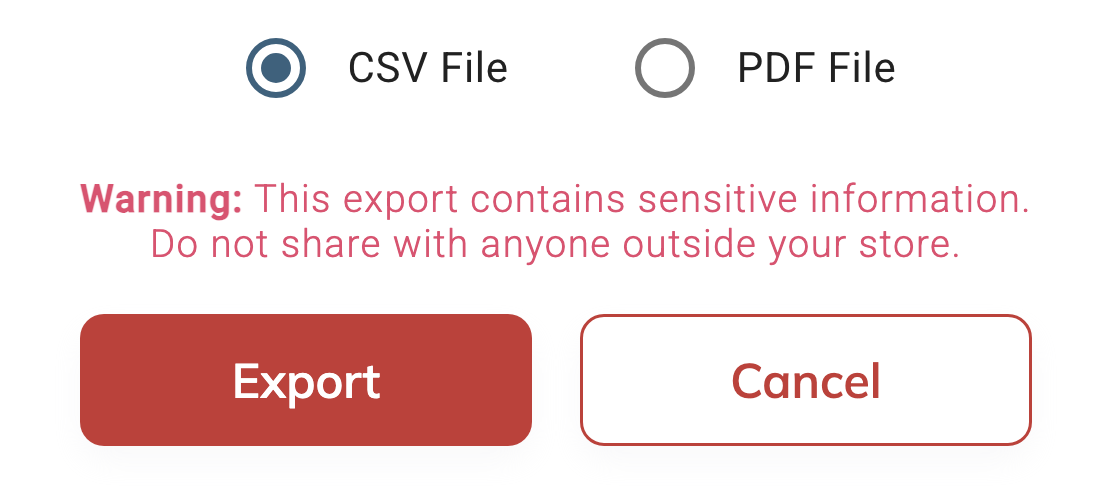
Finally, select either CSV or PDF and click the export button to download a copy of the generated report.
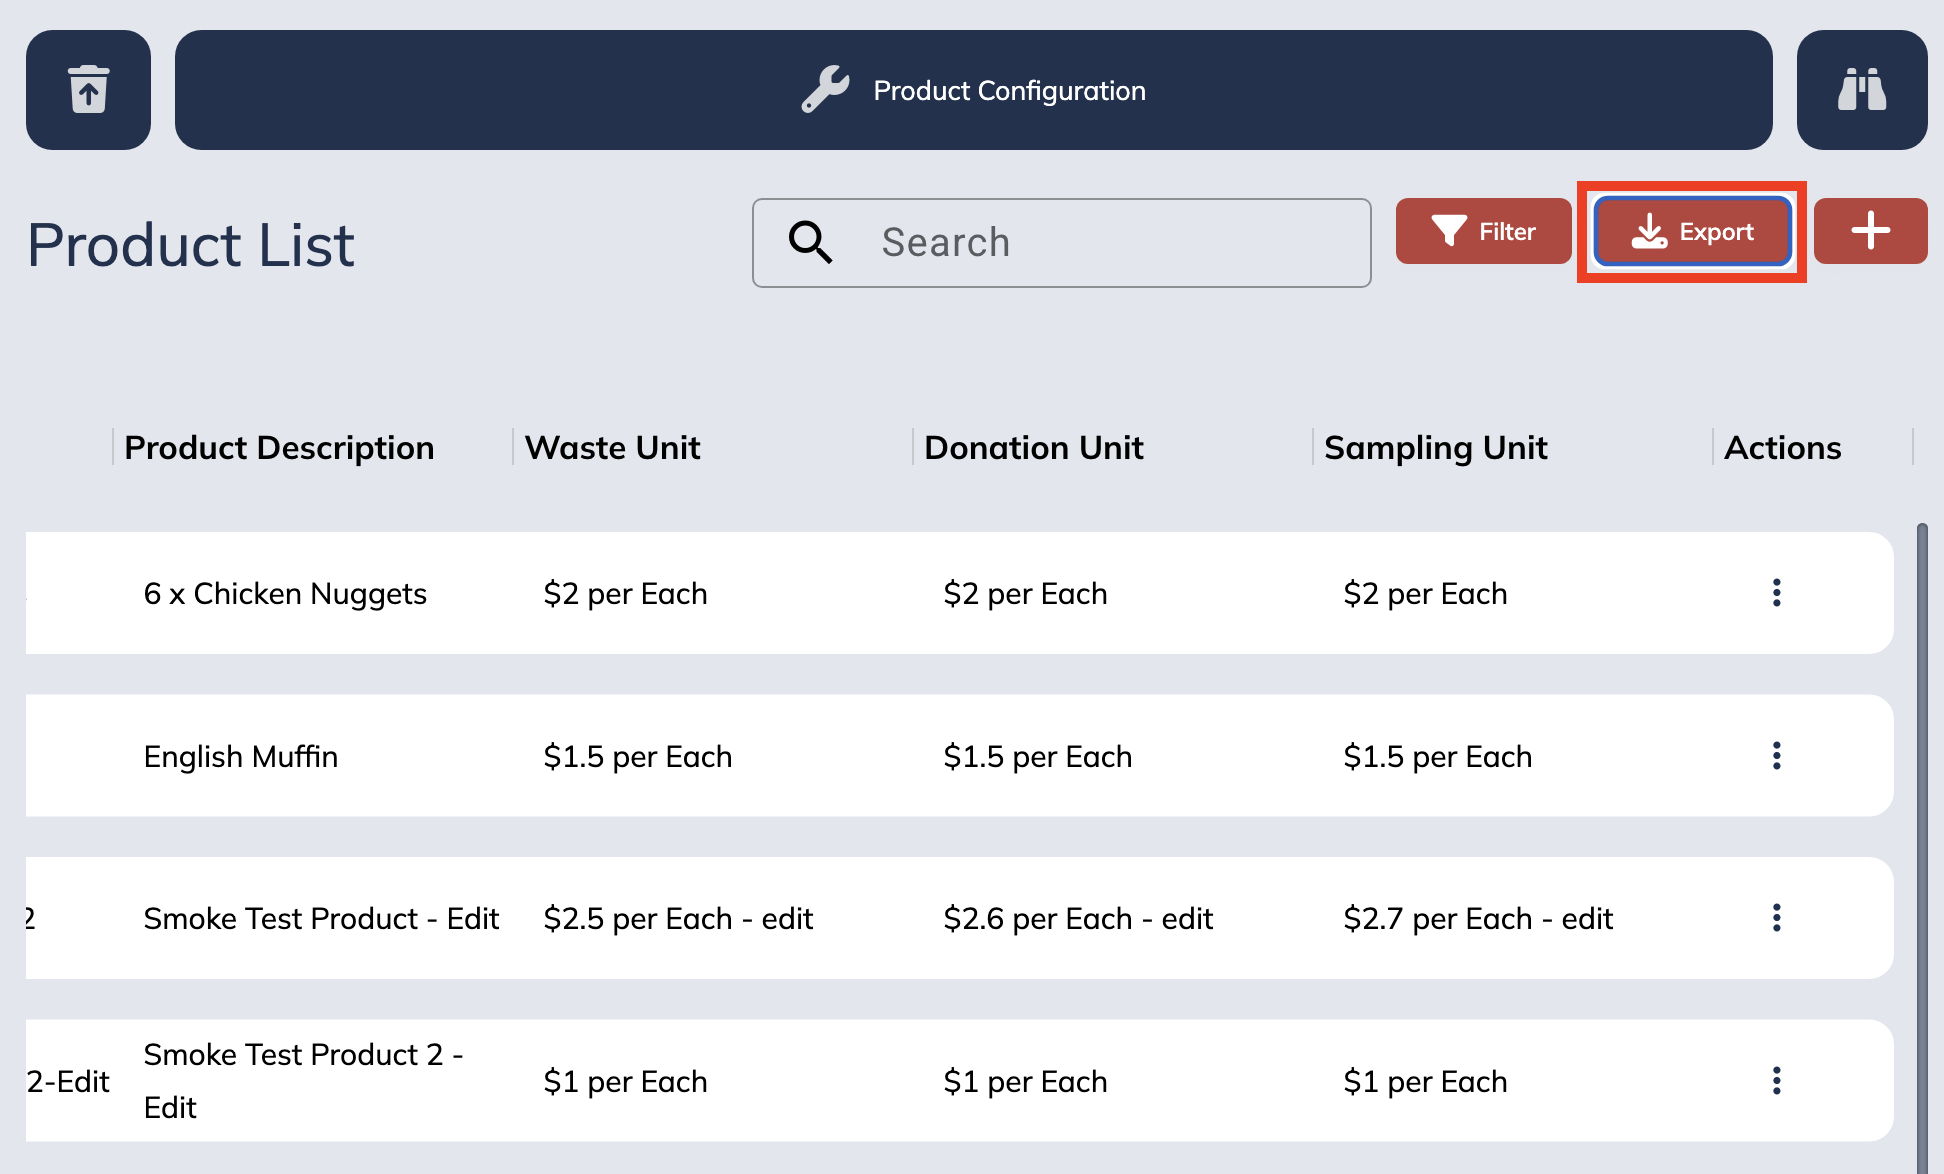
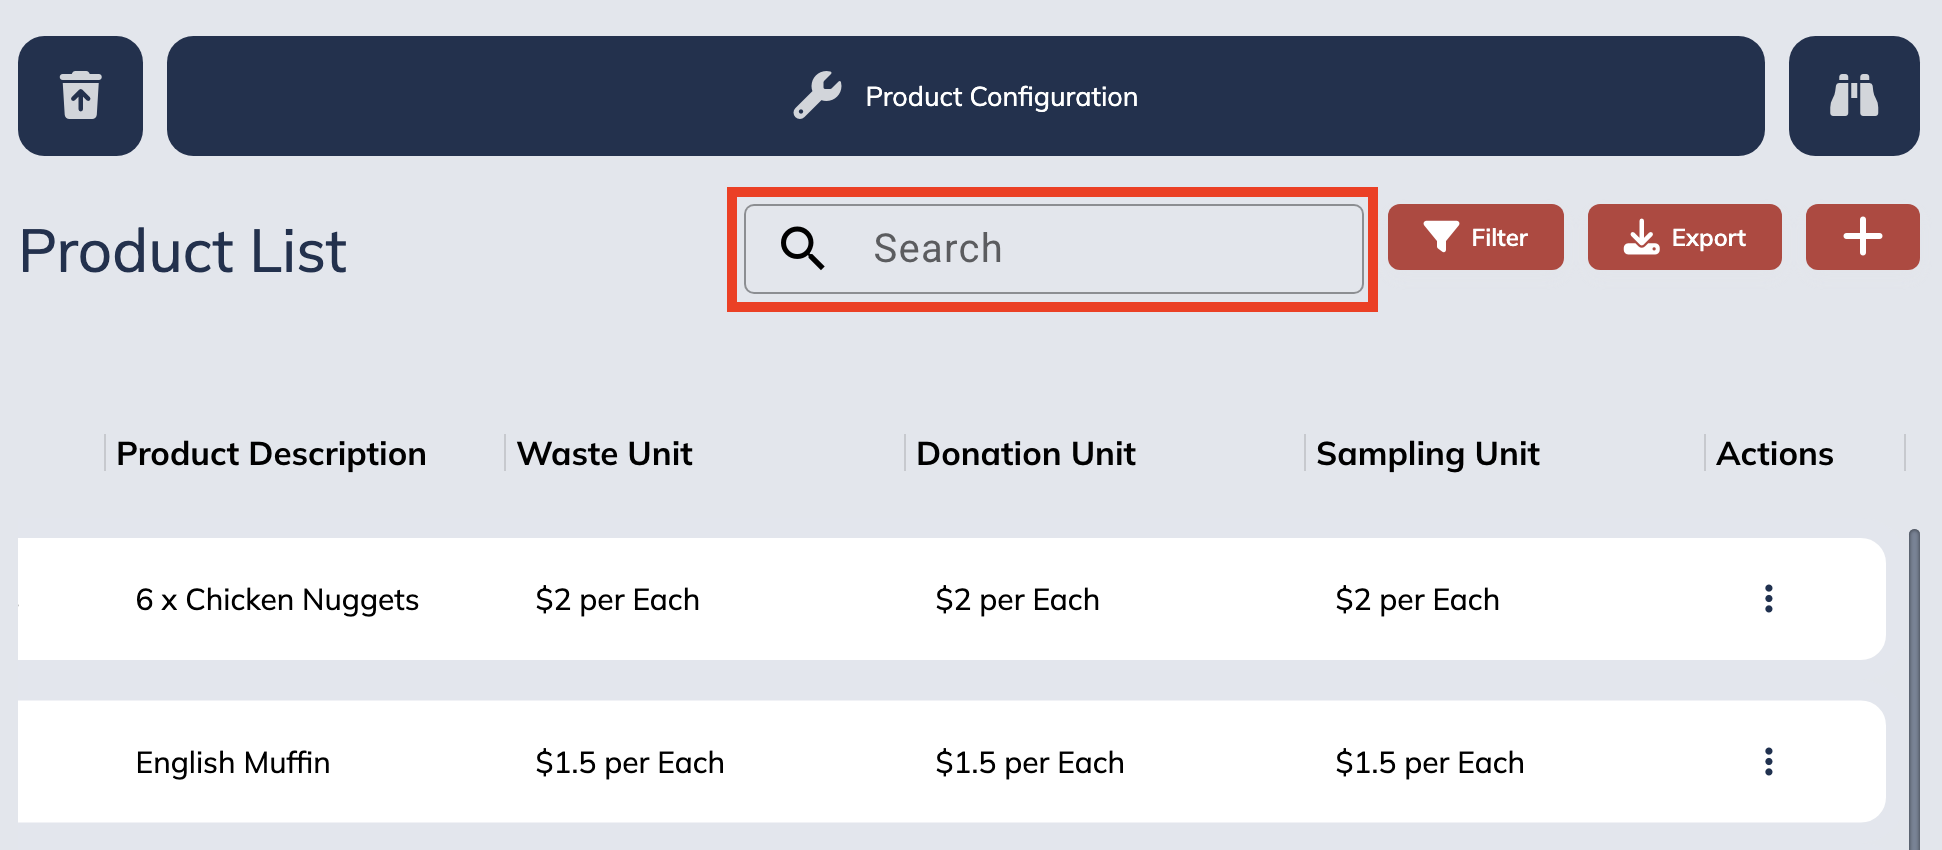
Product Configuration
To configure your Waste products, open the Waste on the left menu, press the wrench icon on the top of your screen.
On the “Product Configuration” screen, you can:
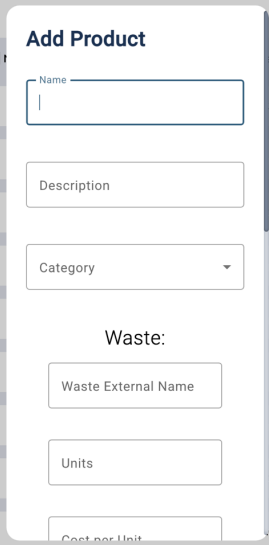
Add a New Product
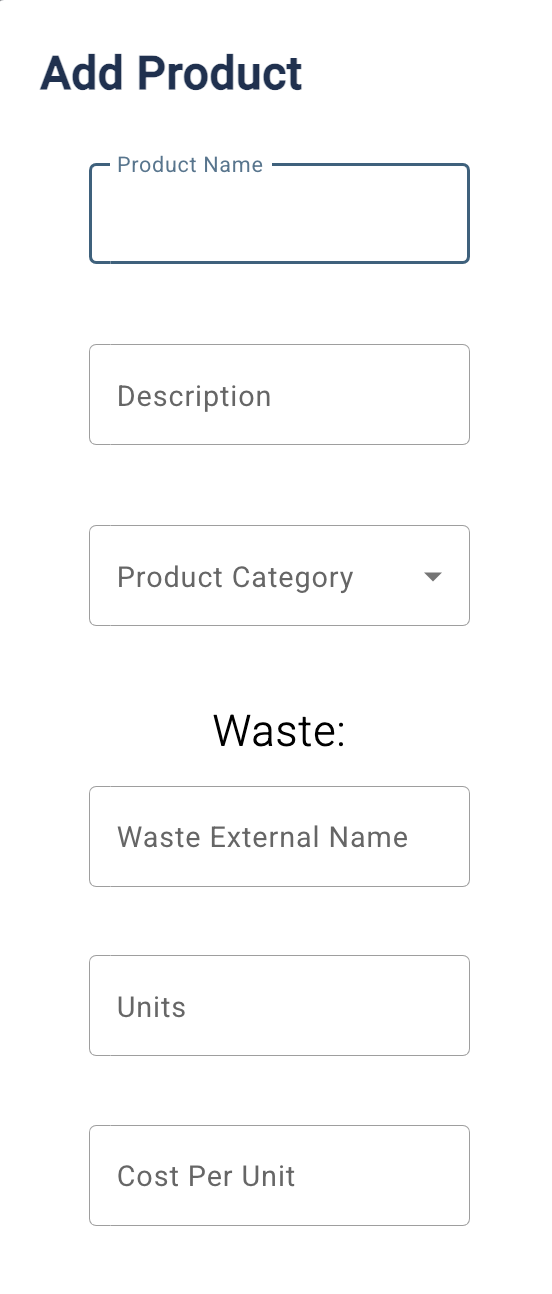
To add a product from scratch, press the "+" button on the top right of the Product Configuration page. Input the product name, description, and choose a Product Category. Then set the units and cost per unit for Waste, Donation, and Sample. Then press "Save".
Manage Existing Products
While inside your Product Configuration page, you can manage your existing products by pressing the three dots on the right side of the rows.

- The “Edit” option launches a pop-up window where you can edit all of the properties for the current product.
- The “Delete” option removes the waste product from your list of waste products entirely.
- The “Duplicate” option creates a copy of that waste product that you can then configure.
Search
Using the search bar, you can search for any product by typing its name.
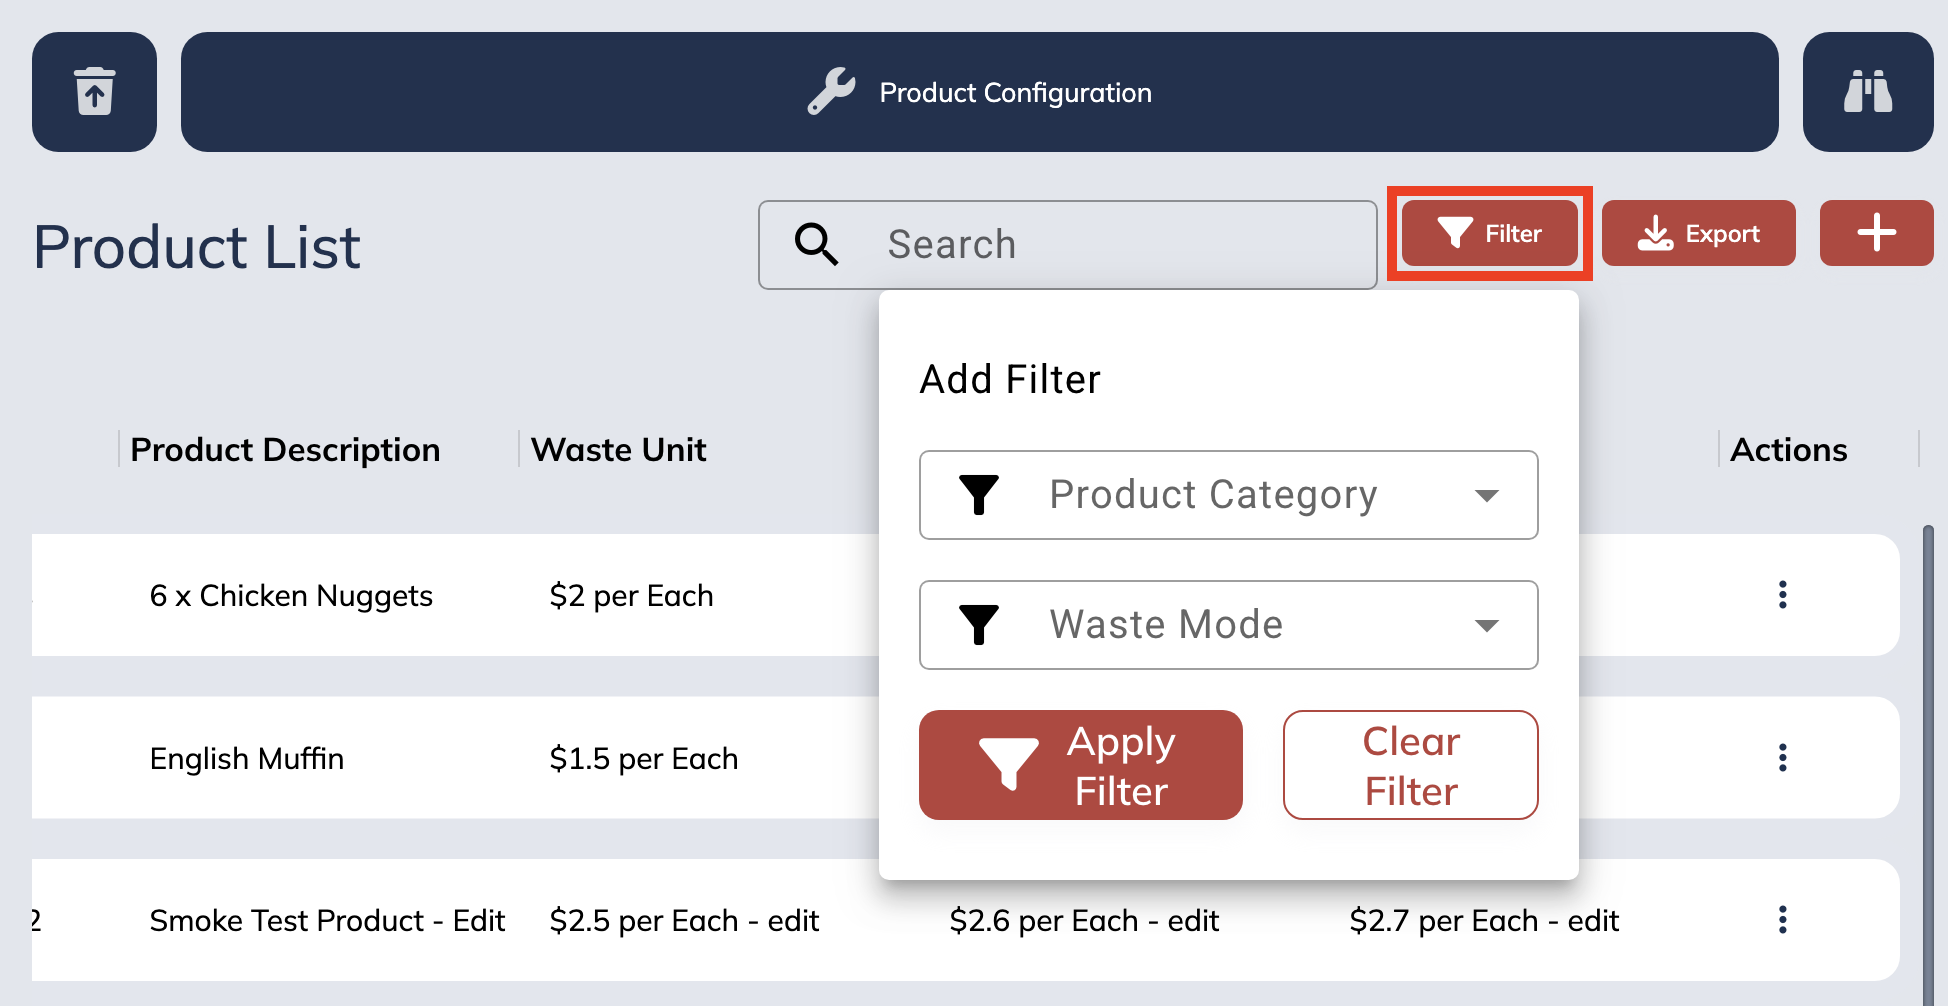
Filter
To access the other available filters, you can click on the “Filter” button to launch a pop up. From this pop up, you can select either a product category, a waste mode or both to filter the displayed products by. To apply the selected filters, simply click on the “Apply Filter” button. To reset all current filters, click the “Clear Filter” button.
Export
For ease of access and recording on other platforms, OneClick has a built in exporter for waste products. You can download your reports as a CSV using the “Export” button. Clicking this button will download a CSV of the current products to your device.