Table of Contents
Overview
Passports serve as centralized training system for those Team Members who need step-by-step onboarding's. You can meet compliance, track an individual learning progress, and ensure they are meeting all the milestones needed. Passports are directly linked to Training Ratings, and sometimes can be considered the Team Member's "first rating" in the system, although you may find it useful for a Team Member to re-do a Passport to stay refreshed on protocol.
Passport Items each represent a single requirement and keep track of the status as well as the information about who completed the item, and when. Items can be organized into Sections. All of the items (in all of the sections) in a passport must be completed before the passport can be completed.
Therefore, passports serve as a way to transparently communicate to all team members the requirements to move up in the organization. They provide stability and consistency in the way your team is managed. They also empower individual team members know (and meet) all the requirements so they can learn a new skill or gain the next promotion.
Key Idea: Development Passports track the progress of an individual towards a new position or role within the organization
Training vs Leadership
There are two different kinds of Passports, and each is managed differently. These are the two different kinds:
- Training Passports track progress towards proficiency in a Training Position.
- Leadership Passports track progress towards a new Leadership Role (Finishing the Leadership Passport doesn't give them that permission level in the app. You would need to add the permission from their profile if they are ready for that permission).
Learn more about these below.
Training Passports
Training Passports represent progress toward a new training position in the restaurant. Each of these passports is inherently linked to a training position; adding and removing a training position will also add or remove the corresponding passport. The order of these passports is controlled by the order of the training positions. Since there are separate FOH and BOH training positions, there are also separate FOH and BOH training passports.
What are "Training Positions?" These "Training Positions" are the set of positions that trainers can rate employee on. Learn more about customizing Training Positions.
Note: Adding and removing a training position will also add or remove the corresponding passport.
See it in Action:
Leadership Passports
Leadership Passports represent progress towards a new leadership role and its corresponding set of permissions within OneClickApp. Each of these passports is inherently linked to a permission set in the entire business; adding or removing a permission set also adds and removes the corresponding leadership passport. The order of these passports is controlled by the order of the leadership roles. Just as permission sets are shared between all teams of the business (FOH, BOH, Delivery, etc...), leadership passports are also shared among all teams of the business.
Properly understood, this system allows a large team to be managed together. Different teams (FOH & BOH) can have unique requirements corresponding to their unique positions, and the whole restaurant can have a set of shared requirements that anyone from any team could follow to progress along the leadership path.
What are the "Leadership Roles?" They are the same as the Permission Roles configured in the restaurant. Learn more about Configuring Permissions Settings. Note that the linked article discusses a table of permissions settings; there is a leadership passport for each column in the table, and adding a leadership passports requires adding a column to the table.
Note: Leadership passports are also shared among all teams of the business. Changing one will affect both the FOH and the BOH.

See it in Action:
Other Passport Type
We do not currently support any other types of passports. We only support passports linked to Training Positions or Leadership Positions.
Tip: Submit your vote for new features on our Idea Board!
Side-by-Side Comparison
| Feature | Training Passports | Leadership Passports |
| Linked to | Training Positions | Permission (Leadership) Roles |
| Separate FOH & BOH | Yes. Just as each Team has it's own training positions, they each have their own training passports too. | No. These are shared between the all Teams just like the permissions |
| Can add & delete | Yes, by adding/deleting training positions | Yes, by adding/deleting permission roles |
| Can reorder | Yes, by reordering the training positions | Yes, by reordering the permission roles |
| Can edit the content | Yes, directly | Yes, directly |
By default, a Trainer or higher permission can view and complete passports. There are two ways you can access passports for your Team Members.
| Shifts: Long press/click on a Team Members name. Click "Passports". | 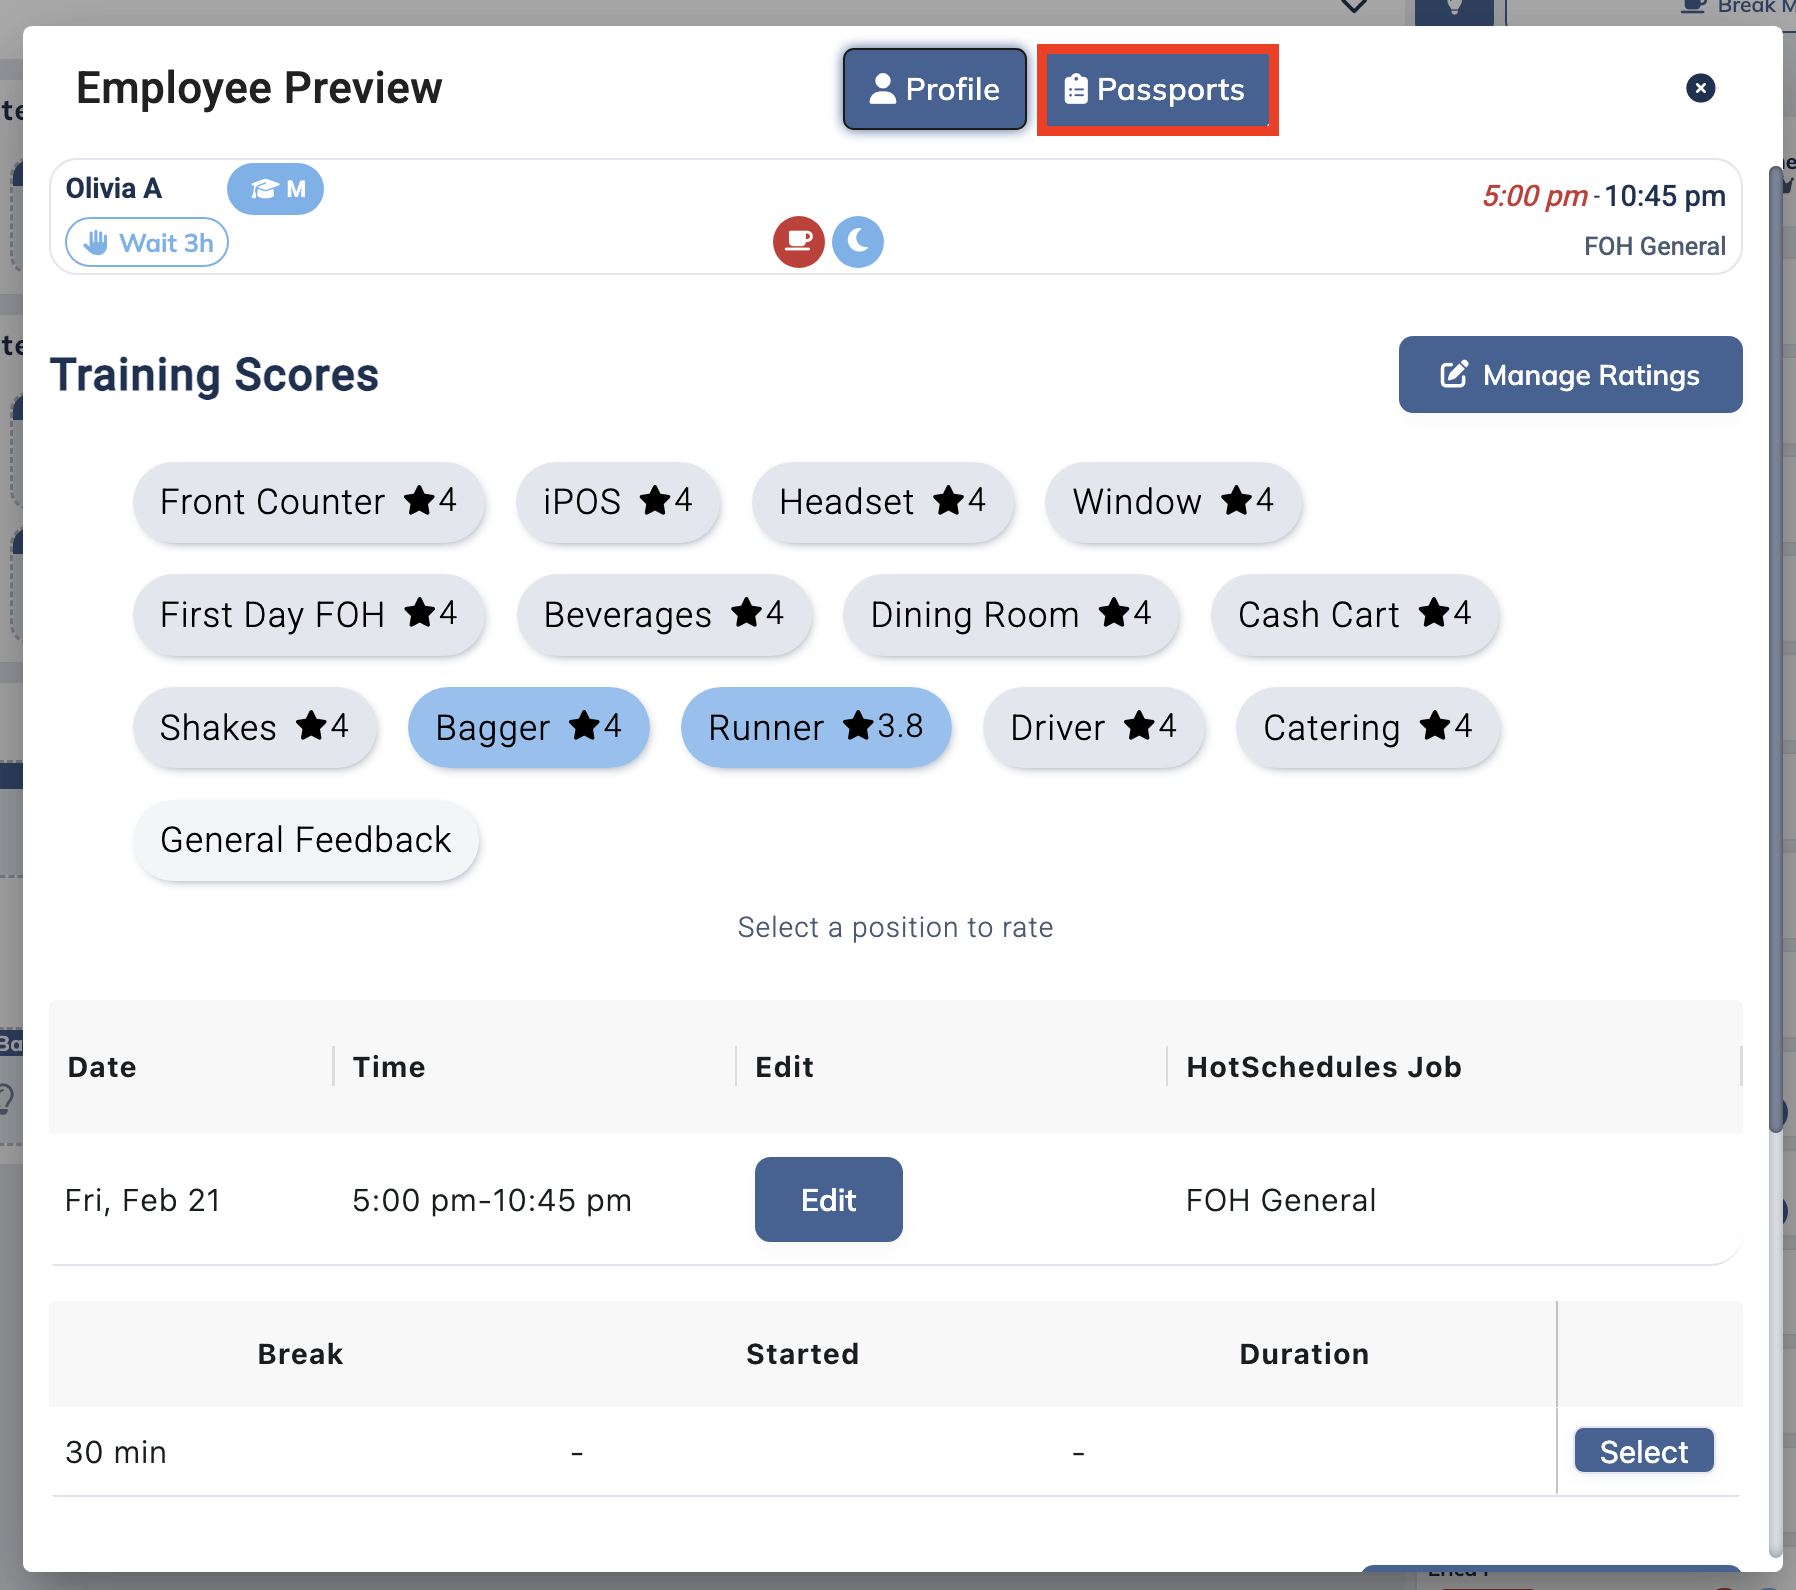 |
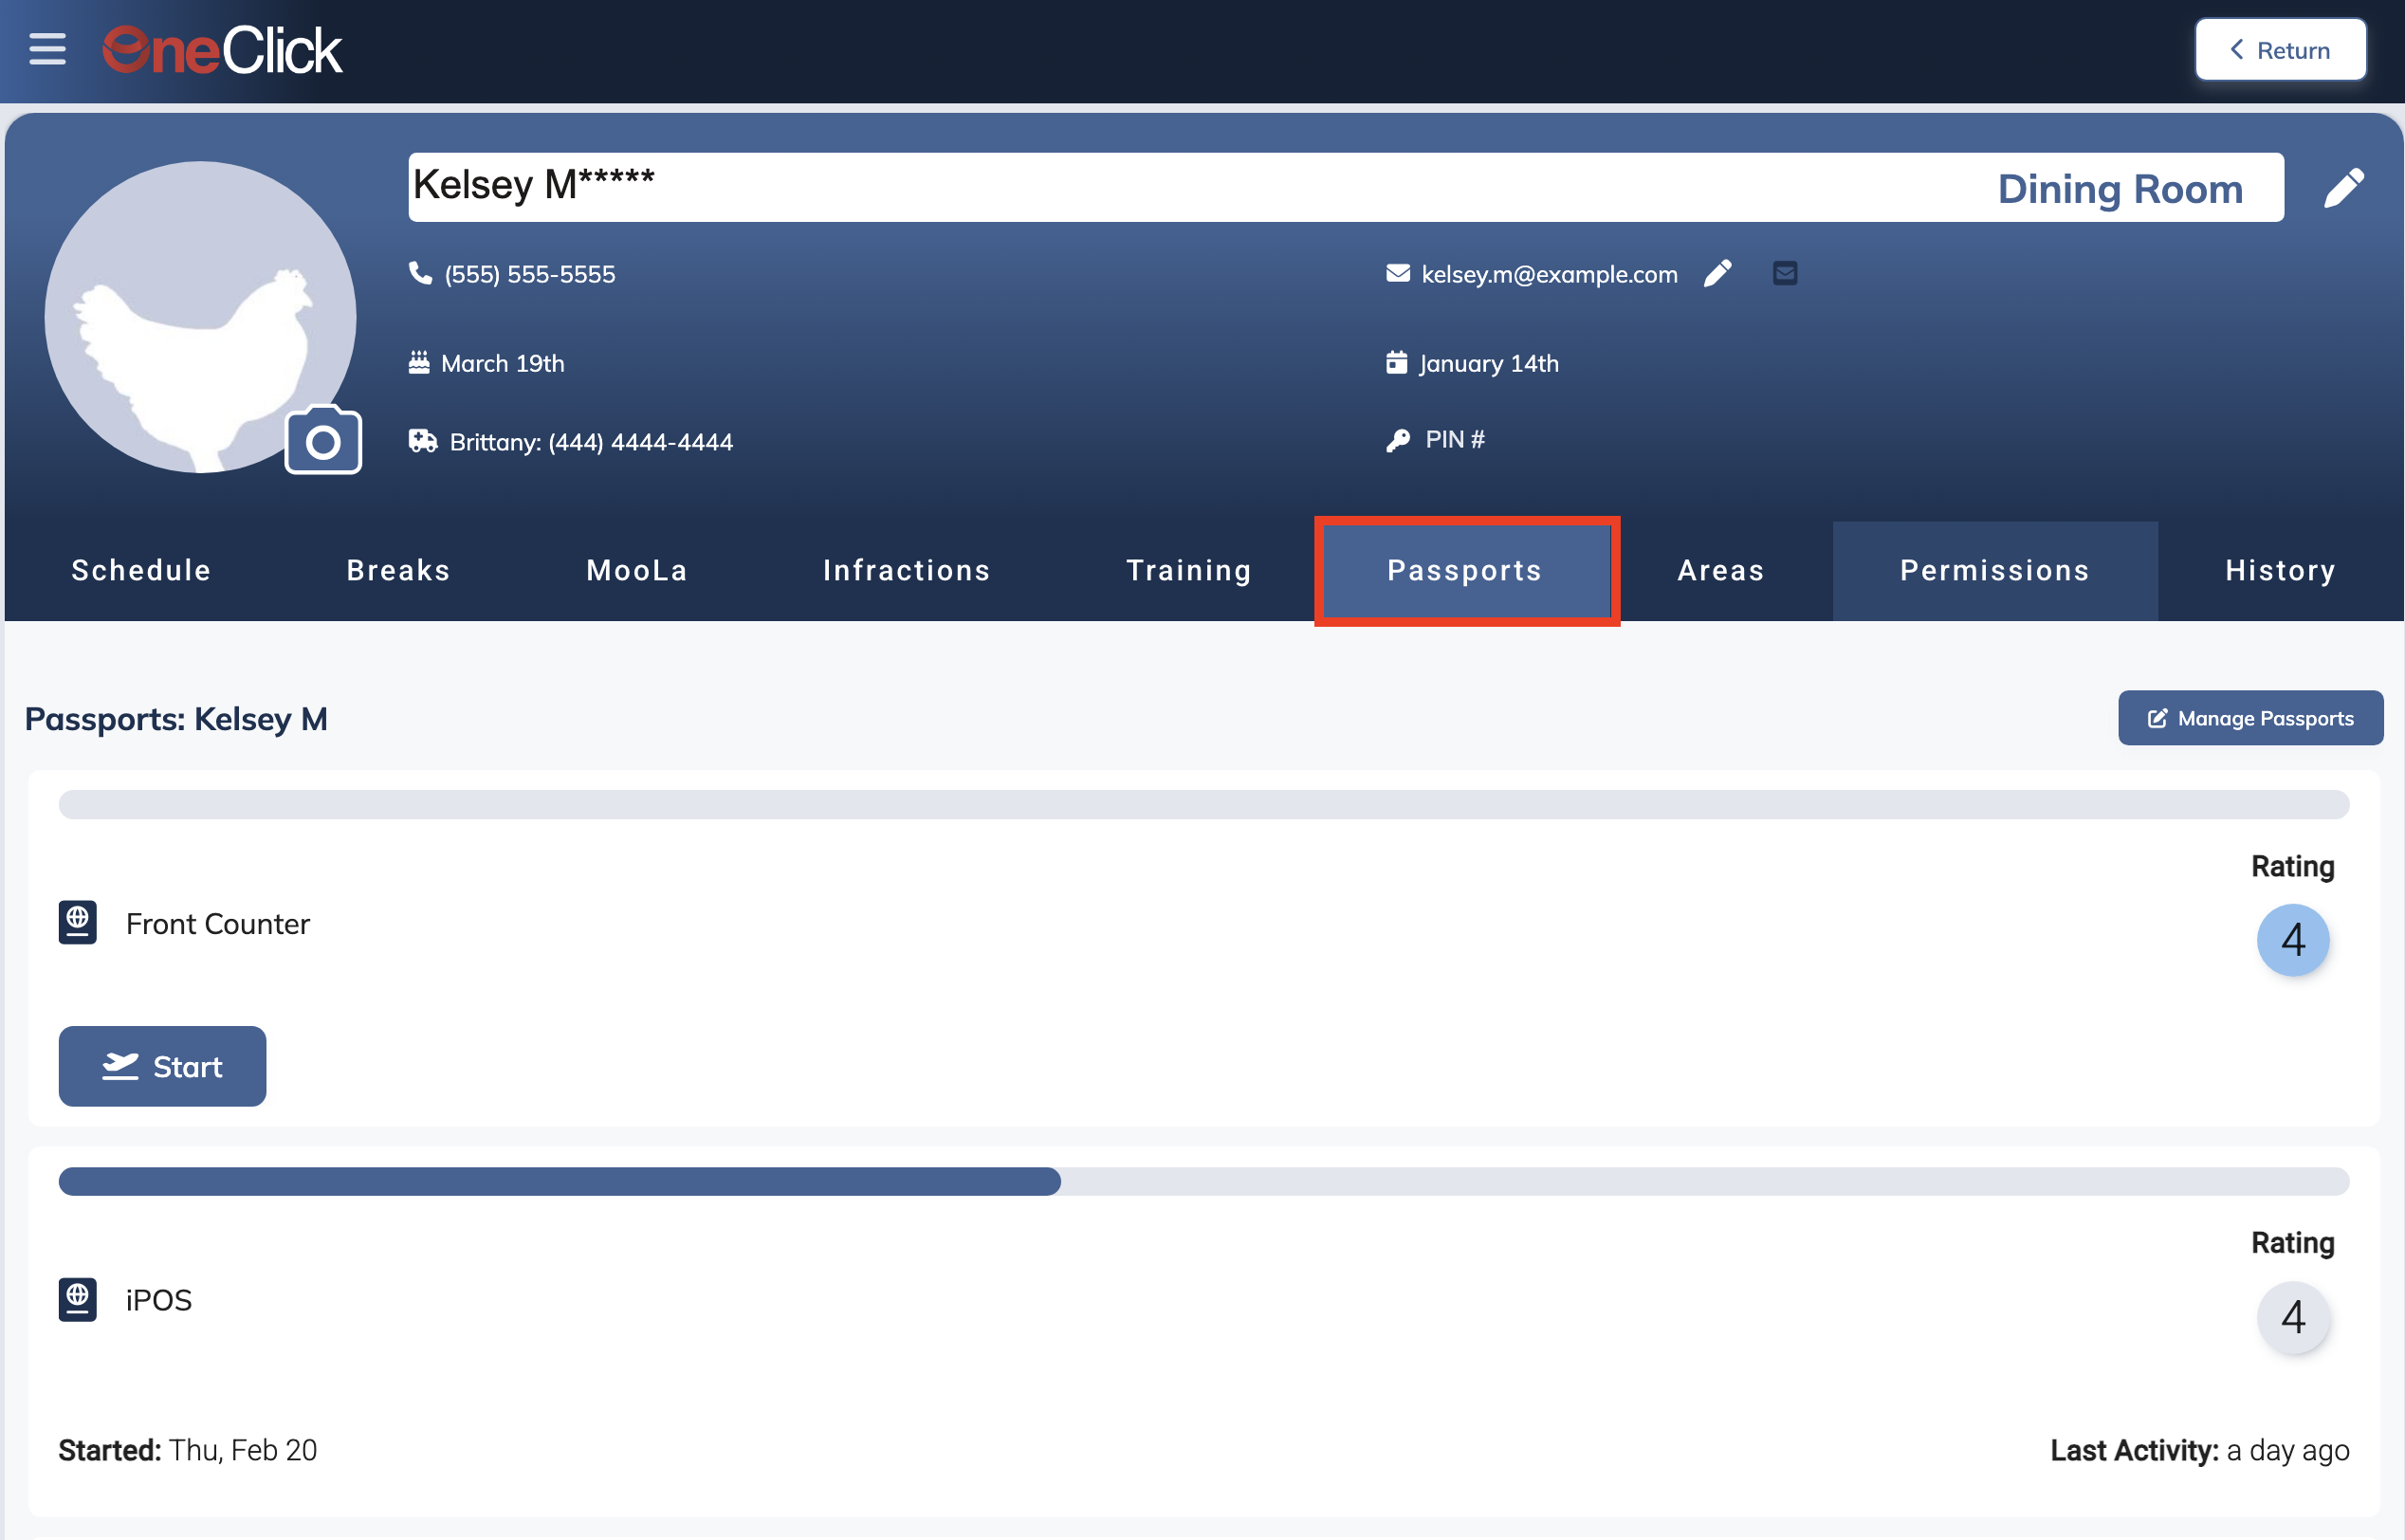
| Profile: Open your Team list on the left menu. Select the name of the Team Member (or any Team Member if editing Passports), then click "Passports" on their profile. |
|
Completing
The idea behind Passports is that the Leader will be guiding the trainee through the checklist, ensuring each task is done correctly. Passports can have the following type of tasks associated to each item.
- Checklist
- Number
- Slider
- Dropdown
- Short Answer
- Long Answer
- Signature
- Photo
- Multiple Phase (Not Started, Demonstrate, Imitate, Repeat, Completed)
The Passport System incorporates Link Pathway 2.0 to facilitate easy navigation and access to training resources. Trainers can include hyperlinks within their passports, providing direct access to relevant materials. Use Markdown language to generate links for your training tasks and explore its capabilities at commonmark.org/help/. You can also see more examples by going to Markdown 101 Passports.
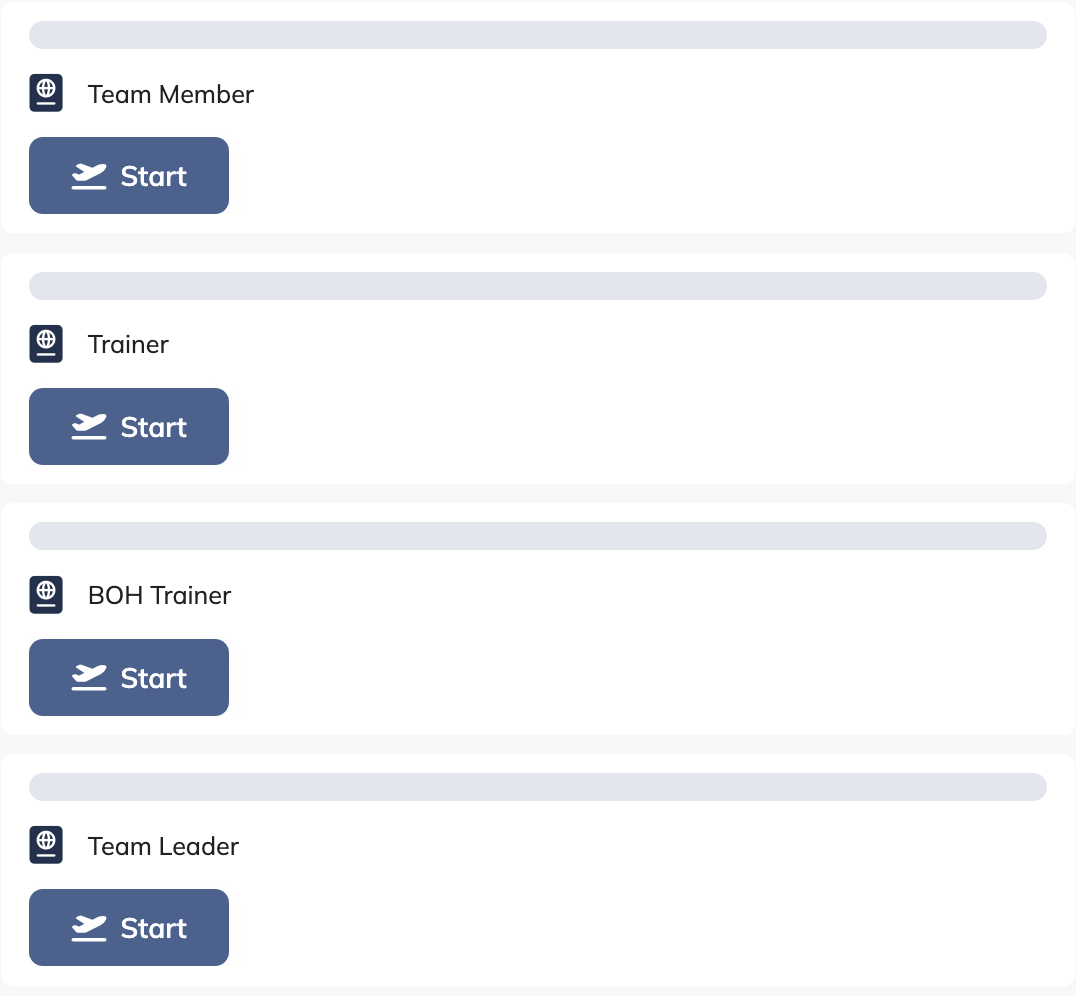
To begin a Passport, press the Start button.

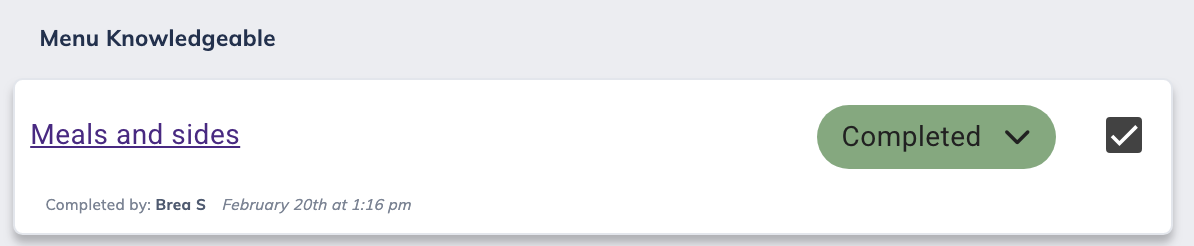
When completing an item, the system will name and time stamp the task.
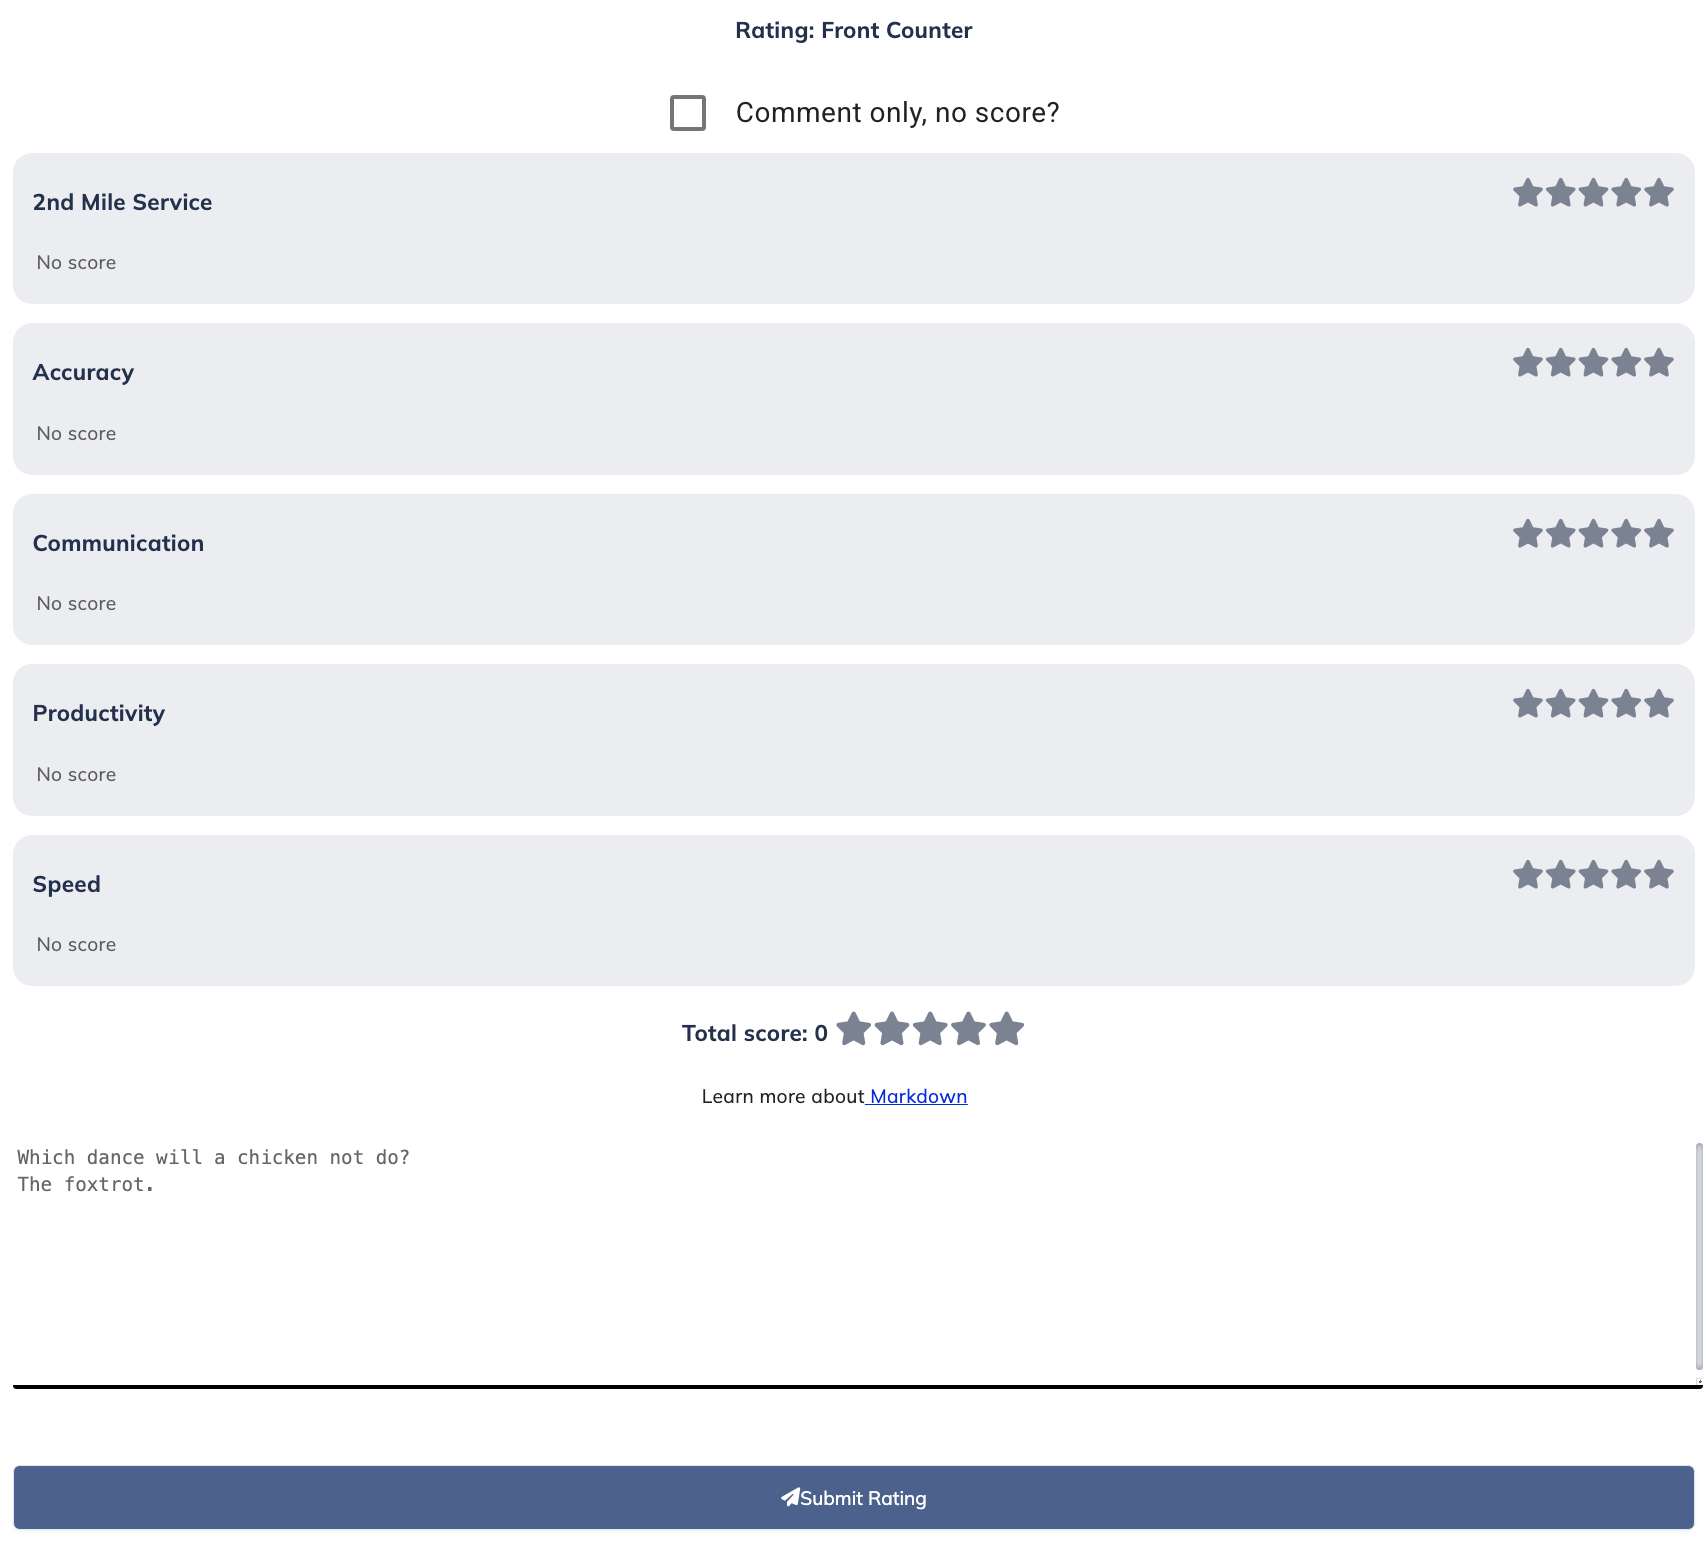
A Training Rating will be provided at the bottom of each Passport where the Leader can assess the Team Member's performance. This Training Rating is commonly the Team Member's first rating and can set the stage for more ratings as they progress.
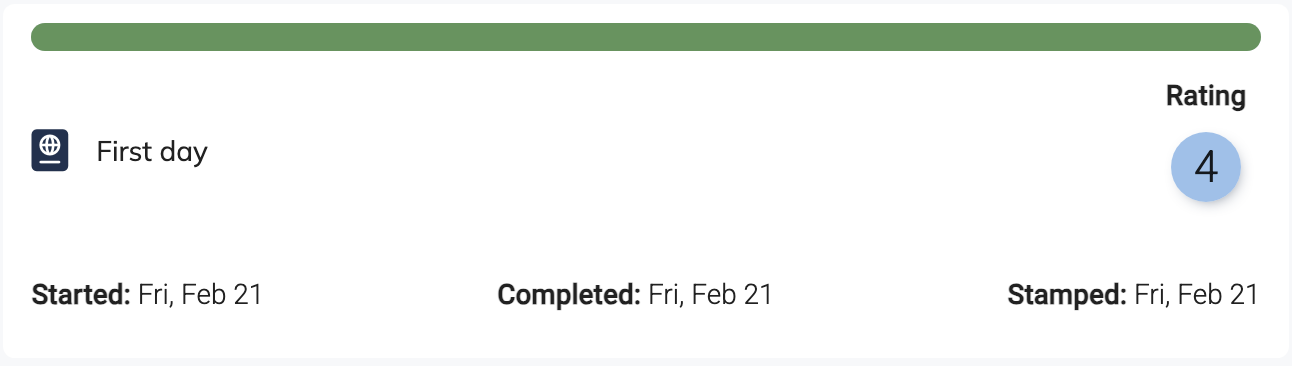
After submitting, the Passport will have a log of when started, completed stamped.
Stamping & Resetting
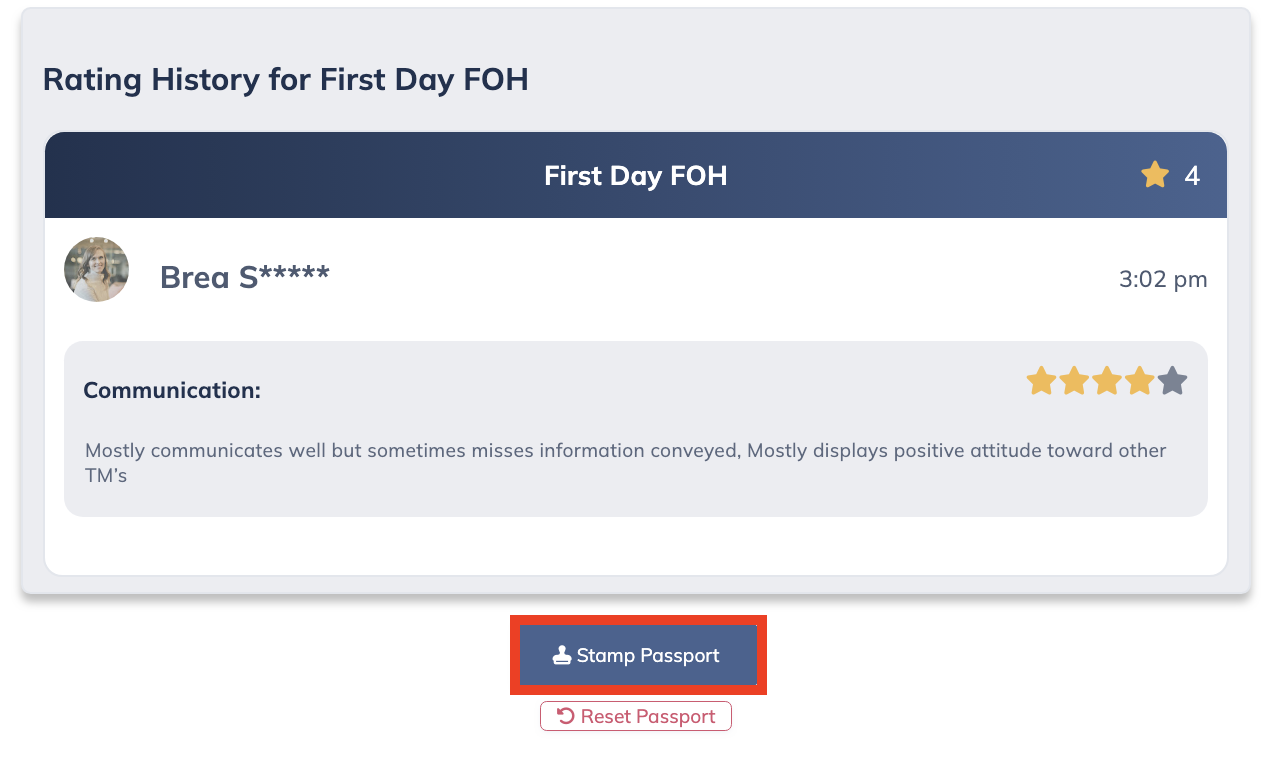
After a Passport is completed (all tasks completed, rating submitted), a Shift Leader or higher permission can stamp it to confirm it is done. This stamp represents a leader's review, confirming the trainee's successful completion of training and qualification for the position. It ensures consistency and reliability in the certification process.
Reset Capability
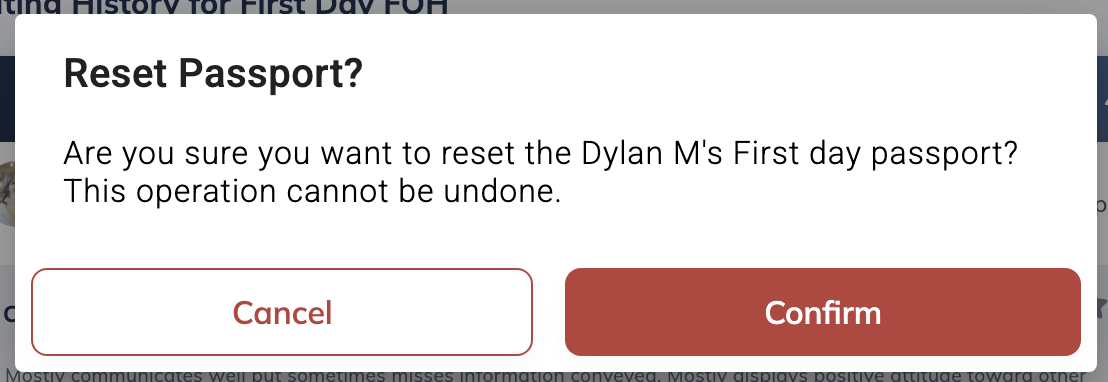
Managers and directors have privileged access to the reset functionality of the Passport System. This feature allows trainees to relearn certain aspects or address inadequate initial training. It ensures the integrity of the certification process.
Create Passports
Due to the syncing nature of Passports and Training Ratings, you cannot create or rename Passports in Settings directly. Instead, creating or renaming passports will need to be done in the Training Rating Settings, which then will be reflected in Passports. For instance, you want to add a Desserts passport in your training program. To do this, you would do the following:
| 1. Go to Settings - Training Rating |  |
| 2. Press "+ Create New" to make a new position/passport, or press three dots on the right of a position to edit. |   |
| 3. Make your edits preferred edits. | |
| 4. Go to Settings - Passports to see new Passport. You are now able to configure the list. |
Manage Passports
Only leaders with permission can edit passports. While this rule can be configured, the default requires a "Manager" or higher to edit the passports. See Configurable Permission Settings (Manage Passports) for more details. The rest of this section assumes you have access to this permission.
Auto Save for Passports
Any changes made on the Passport Settings page are automatically saved to ensure no work is lost. For text-based edits—such as the task description, section name, or passport name—changes are saved when you click outside of the text field.
Passport Content
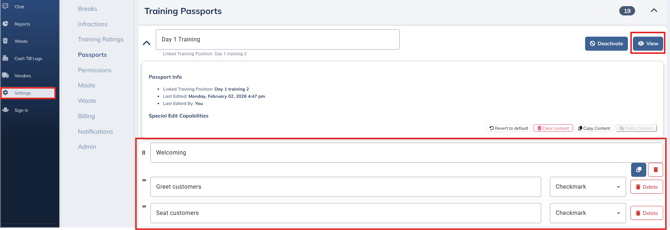
To edit the content of a passport, go to Settings -- Passports. You can open a passport to review, then edit individual items. Passports work similar to Checklists. They use many of the same controls, and many of the same features are available on passports just as they are in checklists. The key difference is that passports are designed to apply to each of the employees in your restaurant individually; this makes them a good method of distributing information and ensuring that everyone in the restaurant has completed it.
Editing View:
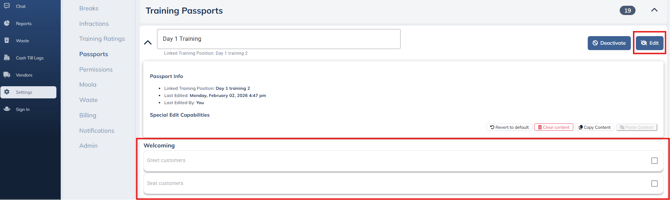
Edited View:
Passport Titles
Passport titles are linked to Training Ratings. For this reason, titles of passports can only be changed through our Support Team. Please contact them here.
Despite the link between passports and the positions or roles they represent, changing the title of a training position or a leadership role will not change the title of the passport as well. Usually, our support team will handle this for you, but if something needs to be adjusted, just reach out.
This has been displayed in the past, and it still holds true. Currently, due to technical limitations, if you attempt to edit the passports on two different devices at the same time, one of the devices will overwrite any changes that you had been making on the other device.
To avoid any problems related to this, just make sure to save often and only try to edit the passports on one device at a time.
Reordering Training Tasks
To further customize the training experience, managers can easily reorder the list of training tasks within a passport. Similar to the functionality of checklists, managers can use drag-and-drop capabilities to move tasks up or down the list. This flexibility empowers managers to prioritize training tasks based on urgency, relevance, or specific developmental needs.
![]()
Changing Input Types
The Passport Manager allows managers to modify the input types within a passport. Managers can leverage dropdown lists to change the input field associated with a particular training task. This feature enables managers to adapt the input requirements based on the nature of the task. Available input types include photos, signatures, number and text fields, dropdown fields, and checkboxes, offering versatility and customization options.

Revert to Default
In the event of accidental modifications or deletions, the Passport Manager provides a "Revert to Default" functionality. Managers can easily return a passport to its original default template, ensuring consistency and preserving important sections. This feature acts as a safeguard, preventing unintended alterations and allowing managers to recover any accidentally removed sections or tasks.
Adding Photo/Link/Bold
You are able to add example photos or links to checklists/passport using a simple Markdown coding. Read below to learn more.
Photos
- Upload the photo to a cloud storage service like Google Drive.
- Click on the photo and select the 3 dots and open in a new window. NOTE: this will not work when looking at the photo preview, must open in a new window!
- Copy the HASH (random numbers and letters)
- Example: https://drive.google.com/file/d/1IzKVa6SQO3LvoiaLGl1tXkRFEEzGtHEq/view
- Between d/ and/ view HASH = 1IzKVa6SQO3LvoiaLGl1tXkRFEEzGtHEq - Access the passport/checklist manager where you want to add the photo.
- In the task, use the following syntax:
TaskName - Here is a complete example that you can copy and paste to try it out yourself:
See it in Action:
Links
- Go into the checklist/passport task where you want the link to be embedded.
- In the task, use the following syntax:
- [taskName](paste_LINK)
- Here is a complete example you can copy and paste to try out for yourself:
- [Basics of OneClick](https://kb.oneclickapp.com/6-minute-product-demo)
- Save the checklist/passport to ensure the link is properly included.
See it in Action:
Bold Text
You can emphasize words or phrases by making them bold using either double asterisks (**) or double underscores (__). Simply add these symbols at the beginning and end of the word or phrase you want to make bold.
Example: I want this to be bold
You would add **this.
When rendered in the checklist, it will appear as:

Remember to save the checklist/passport after making the desired text bold